What if I told you your Pay Per Lead agency could make over $1 million a year?
If you’re on this page, I’m guessing that you haven’t quite hit those figures yet.
(Don’t worry, I’m going to show you how!).
Let me be clear from the off – if you’re new to lead generation or digital marketing, then this post isn’t for you (sorry).
This post is for digital marketers with experience under their belt. The ones that know the basics of lead generation, have set up their business, and are spending thousands of dollars on paid ads.
It’s for the agency owners, SEO peeps, affiliate marketers, or even business owners who aren’t making as much money as they’d like, and want to know how to make more.
It’s for those who’ve got a good footing in the digital marketing world, and want to grow and scale their business to hit that golden 7-figures a year mark.
But, most importantly, this post is for those who aren’t having much luck in their current niche/vertical and want to start effectively from scratch.
Let’s kick some ass.
Step 1: Choosing a Niche For Your (Soon-To-Be) 7-Figure Agency
If you want to be successful in Pay Per Lead advertising, you’ll need to focus on a vertical or niche to specialise in.
For those of you who are used to retainer contracts, you’ll know that it’s all about the grind. But when you start getting into Pay Per Lead, it’s a good idea to niche down.
Specialising in one vertical (at least, at first) is crucial. Many of you who’ve been on retainer contracts will know the pain of trying to juggle several niches at once.
The outcome? Your skills were spread too thin, and you became a “jack of all trades”. You also weren’t able to spend as much time on one niche as you’d like, meaning you never got to hone your craft.
Specialising in one niche will allow you to build your skills in one area. As your reputation grows, clients will seek you out specifically because you’re an expert in the niche they work in. Specialists have the opportunity to charge much more than their “generic peers”, as the work they do is worth so much more.
In this section, I’m going to help you find your specialised niche and, even better, I’m going to help you find a vertical with the biggest profit potential.
For the rookies among you, finding the niches with the biggest profit potential usually means finding an “evergreen” offer. That means searching for industries that can do well year-round, that will prosper even in times of economic hardship.
It’s not as difficult as it sounds, and I’ll help you figure this out in just a moment.
But first, I’m going to issue the same warning I do in all my posts.
If you’re honest with yourself, you became interested in Pay Per Lead because it’s a feasible way to make a 7+ figure income and be your own boss.
Unfortunately, some niches are going to stand in the way of that dream more than nurture it.
That’s why I want to talk about Pay Per Lead niches to avoid before I move on. Please note that this has nothing to do with how valuable the client is as a business, nor how they run their company.
It’s mainly due to other factors, such as:
- Location
- The population of that location
And, or either:
- The number of customers that business can handle
- The likelihood of that business remaining stable during a financial crisis
In this instance, I’m talking about local businesses such as gyms, plastic surgeons, and dentists.
There are two reasons for this. Firstly, from a Pay Per Lead standpoint:
Small, or independent, businesses tend to get overwhelmed when they have too many leads. This is because, usually, they don’t have the systems in place to handle them. If you’re getting paid by the lead, and they can only deal with 25-30 a week, you’ll not be making the same level of profit you would with a “bigger” client.
These small businesses can only serve their local community. If that’s 10,000 people, you’ll burn through your audience. The audience will experience ad fatigue very quickly, causing cost per lead (CPLs) to rise too high.
If the country (or the world) finds itself if a recession, local businesses are usually hit with the following problems:
-
Small businesses are often hit the hardest (especially those that offer “luxury” services)
- Reduced cash flow and reduced demand mean the firm will lose business
- Workers will get laid off due to budget cuts (fewer people to manage and close any leads)
- Marketing is the first thing to be thrown out of the window when small businesses face financial restraints. Though advertising is what they need to do most, many small businesses drown under a mixture of pressure and lack of funds.
To get ahead and achieve your dream of a 7+ figure agency, you need to find clients with a nationally appealing, evergreen offer. That means finding something many people absolutely cannot do without.
Plus, with a national client, it’s 150x easier to generate leads. With a nationally appealing offer, the whole country’s population is your potential market.
The bigger the advertising pool, the less your leads will cost to generate – even in times of economic hardship. You can produce more leads for a lower price, which you can then sell to your client for a big profit.
There are two ways to find this golden offer, and they are:
- Search for clients that work in a “money for jam” offer
- Find a sub-niche, or “niche within a niche” in a high-volume vertical.
Chosen your niche?
It’s time to grow your PPL agency to 7 figures.
Start now.
Everything you need to know is in my book.
“A must-read for any agency owner who wants to learn the most profitable agency model in existence.”
Chris Von Wilpert, Content Mavericks
Either of these methods can be extremely profitable with the Pay Per Lead model.
Let’s begin with looking for a sub-niche.
Finding a Profitable Sub-Niche In a High Ticket Vertical

When it comes to choosing niches, my first piece of advice is always “stick with what you know”. You’ll have an understanding of the industry, know the customers you want to target, and will have a good idea of what works in a sales funnel. You’ll also have a great “foot in the door” as you’ll have some clients in that niche already, plus you’ll be able to reach out to more with few problems.
However, some of you won’t have this experience and/or you’ve been working with “small-time” clients that aren’t bringing in enough profit.
If you’re starting in a new niche, don’t try and play with the big boys too early. That will come! But, as a rookie, you need to “learn” your niche first and hone those skills.
That’s why finding a sub-niche is so important. You’ll get to focus on a micro-segment of the market while dealing with much less competition. You’ll also be able to properly define your target audience, and make your subsequent marketing razor-sharp.
Many of the niches I work in are super-competitive. Some lead generation companies have been honing their skills in a particular niche for decades.
But don’t be discouraged. There are still plenty of ways to make money, even in a saturated vertical.
See, a micro-niche, sub-niche or “niche-within-a-niche” are all names for a smaller segment of any niche market.
Opting to devote your time to a smaller segment doesn’t mean there’s less money in it for you. Instead, you’ll find there’s still plenty of demand, but much less competition.
For example, if you wanted to generate insurance leads, you’d soon find out that “insurance” is a MASSIVE niche. But, if you broke insurance down, you’ll find tens of smaller industries that apply to that sector. For example:
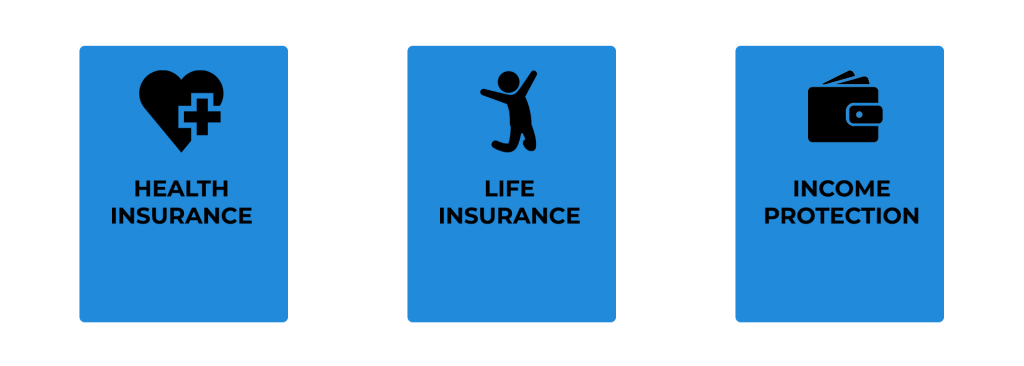
And many more.
However, these verticals are still highly competitive. So, to find your micro-niche or sub-niche, you would need to break these verticals down even further.
Another example:

Or

Seems pretty specific? You’ll actually be far more successful if you drill down to a micro-niche within a broader market.
The great thing about the “niche within a niche” strategy is that you can do it with any market, including “money for jam” industries. (I’ll get onto those in just a moment).
Flexx Digital has generated hundreds of thousands of leads and multiple 7-figures in revenue from sub-niches. All it takes is a little homework and thinking outside of the box.
If you want to find out more about micro-niches, then you can visit this post on what is a micro niche and why should you find one .
“Money For Jam” Niches (I.e. Evergreen Offers)
“Money for jam” is an old idiom meaning a “very easy way of making money”.
In marketing terms, a “money for jam” offer benefits the customer, the business and the person generating the leads.
- The customer benefits because they receive a valuable service in exchange for little to no money or effort. In some “money for jam” niches, they’ll only pay if the service was successful.
- The businesses involved in “money for jam” offers often don’t charge for their help upfront. They’ll just take a cut if the claim/service was successful for the customer.
- The person generating leads will have a vast audience for a typical “money for jam” offer. The bigger the audience, the more leads. On the Pay Per Lead Model, more leads mean higher profits. Simple.
Flexx Digital has had tremendous success running ad campaigns in “money for jam” niches. One of my Twitter ad campaigns generated 680 leads in just four hours.
I made $10,200 in half a working day. Overall, I produced 110,000 leads within that vertical, earning $2,598,980 at a 60% gross profit.
I’ll now give you some examples of “money for jam” niches. For a more in-depth explanation, please read our post, The Recession-Proof, Client-Landing Guide to $100k a Month or check out the video below.
1. Compensation Niches
These are also known as “claims” in the UK, or an equivalent could be “mass torts”, “personal injury”, or “public adjusters” in the USA. Mass torts are civil actions that have many plaintiffs involved against one or several defendant corporations.
The claims industry actually paid for my house and wine cellar in one fell swoop, within 2 years. There are multiple B2B and B2C niches within this space.
For example, you could look at Personal Injury. The Personal Injury niche is classified as “money for jam”, as PI solicitors usually offer a free assessment for anyone who thinks they can make a claim.
Personal Injury can cover all sorts of issues, from employer liability to motor accidents.
Many Personal Injury help firms will also offer a “No Win, No Fee” deal. The legal term for “no win, no fee” is Conditional Fee Agreement (CFA). If the solicitor doesn’t win the case, the person who made a claim isn’t required to pay the legal fees.
Obviously, this is a very attractive option for the would-be customer:
- It only takes a few minutes to register interest in making a claim
- They don’t have to pay anything upfront
- The first consultation is free (something for nothing)
- They don’t have to pay legal fees unless the claim is successful (it’s risk-free).
2. Equity Release

Equity release is a way for older homeowners to access some of the money (the equity) that is within the value of their home.
Baby Boomers are now living to 70+, and their pension often doesn’t cover the lifestyle they want in their twilight years. Equity release is an excellent way to get some extra cash.
I have quite a few students in this niche. Many of them have been blowing the competition out of the water with “long copy ads to quiz” and advertorial funnels.
House prices have risen dramatically over the last 30 years. As a result, many older homeowners have discovered their houses are now worth triple the price they paid (or more – though we must take into account the drop in house prices during a recession).
If they’ve fully paid off their mortgage, equity release allows homeowners to take out some of the current value of their house as tax-free cash.
The most common type of equity release is a lifetime mortgage plan. That means there are no monthly repayments. Your program is only repaid through the sale of the property, if you die, or if you’re put into long-term care.
So, equity release counts as “money for jam” because:
- It only takes a few minutes to work out how much you can borrow against your home
- You don’t have to pay anything back during your lifetime if you don’t want to.
3. Grants
Again, grants have proved to be a very profitable niche for some of our current students.
Small and new businesses are constantly worried about funding. Grants come as a desirable option because they inject capital that doesn’t have to be paid back, apart from the fee as agreed with the lending business.
Unlike loans, grants don’t have to be repaid, and the business owner doesn’t have to surrender any of the company’s equity. As long as the grant is used as agreed, the business can press on without worrying about debt.
Grants generally range between a few hundred dollars to $500,000. If the grant doesn’t cover the entirety of the costs, the small business can see if they have enough money to cover the costs themselves, or they can apply for a loan.
The “money for jam” benefits are:
- They don’t need to pay back the grant money, apart from the agreed fee
- Grants from a reputable organisation can give a small business prestige. The business can amplify this benefit through a promotional strategy that highlights the award. This marketing technique can bring in business they otherwise wouldn’t get.
4. Home Improvements
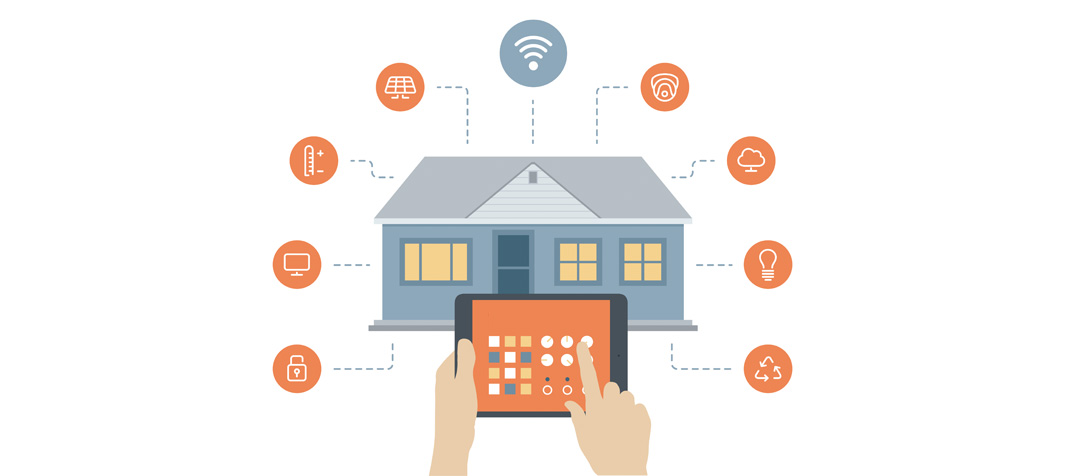
With rising house prices, plus the cost of moving, it’s no wonder that many homeowners would rather make home improvements than actually move.
Plus, with the right sort of investments (insulation, solar panels, etc.), renovations can improve the value of your current home.
Examples of home improvements include:
- Home security
- New windows/doors/flooring/roofing
- Spa installations
- Conservatories
- Solar panels
Though installing solar panels, new flooring or insulation is expensive, home improvements can still count as “money for jam”. The money saved on utility bills and the added value to your home can make home improvements an investment, rather than a purchase.
5. Distressed Property Sales
A “distressed property” is any property that’s under foreclosure or being sold by the lender.
Typically, a distressed property is the result of a homeowner being unable to keep up the mortgage payments. However, it could be a case of the homeowner needing to sell the house to pay medical bills, debts, or any other financial emergency. Distressed properties are usually sold below market value.
In an economic downturn, for example, firms promising to help with distressed properties can be lifesavers. Though the owners will receive far less than what the house is worth, it’s a fairly quick way to get their hands on cash.
Other examples of “booming” or “money for jam” industries include:
- Business lending
- Consumer lending (secured or unsecured)
- Anything insurance-related (life insurance, home insurance, income protection)
- Pension transfers
- Debt consolidation services.
These are just a few examples of boomin/”money for jam” niches, but enough to get you started.
To be a successful Pay Per Lead agency and hit that 7+ figures a year, you’ll need to put the research into finding a niche that works for you.
To do this research thoroughly you will need these tools:
• Facebook Ads Library
• Google Search
• Advert Suite
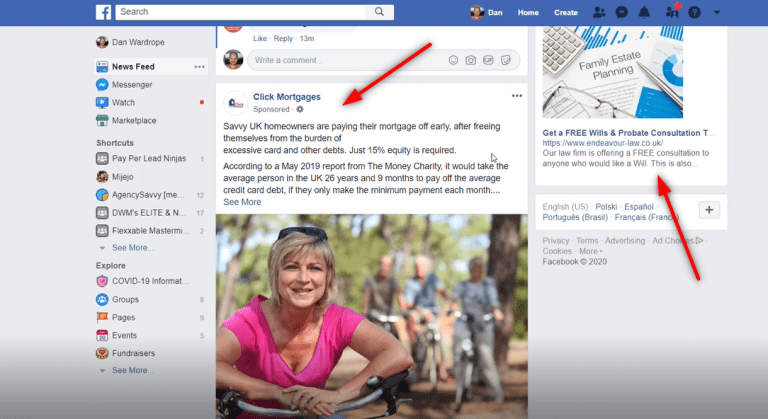
Step 1: See what ads are currently running in your Facebook News Feed.
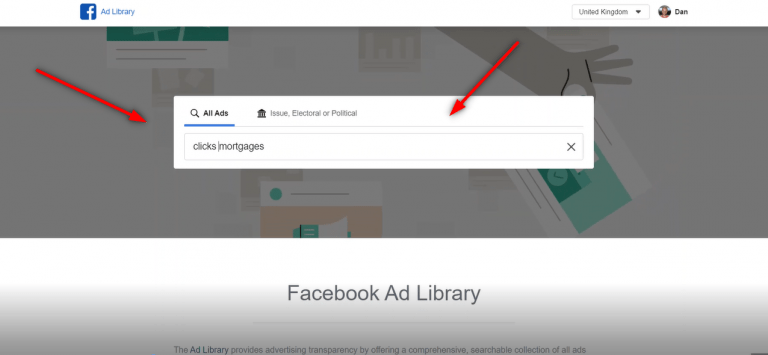
Step 2: Research the companies running ads in Facebook Ads Library
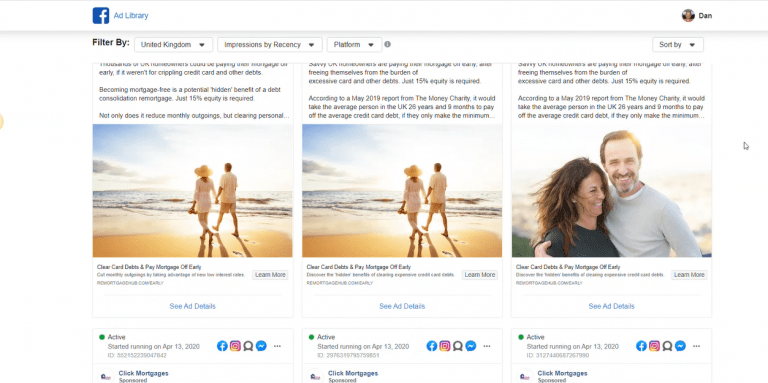
Step 3: Go through their funnels (make notes of what you like/ dislike)
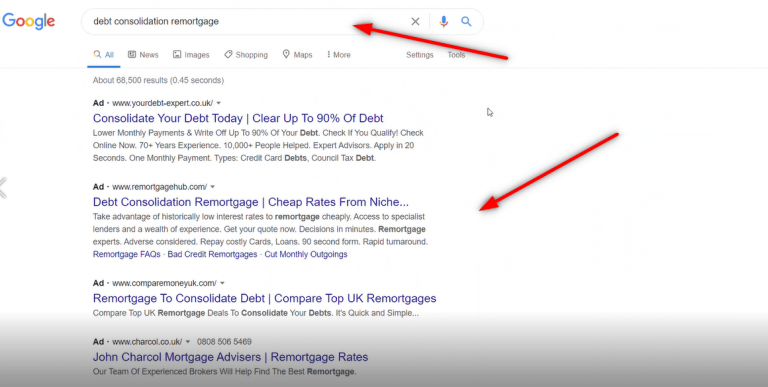
Step 4: Google Search that same niche. See who is running the top ads
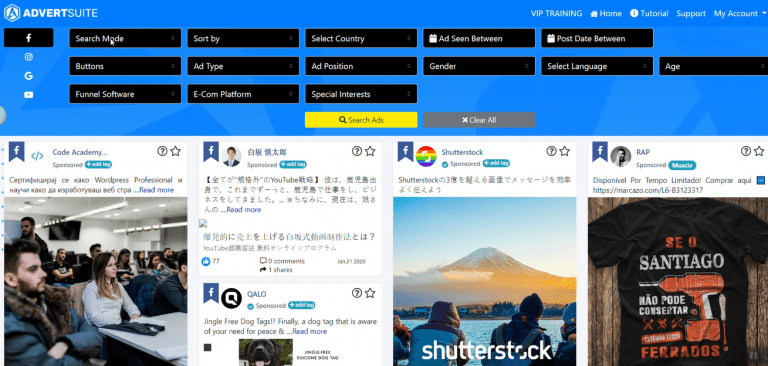
Step 5: Use AdvertSuite To see what ads are currently running
Rinse and repeat this process using the tools mentioned above to pick a niche that you are passionate about.

Step 2: How To Land Clients Without Testimonials or References
There are a few things you can do to land clients without a case study or testimonial.
Firstly, all of you should have some experience running ads in at least one vertical.
So, whenever you approach someone new, you should offer them something I call a “grandfather-type” deal.
The Grandfather Deal
You should start by being completely honest, and admitting you don’t have any experience in that industry.
However, you should then go on to say that you have a great deal of experience in another industry (i.e. the vertical you were working in before). Make it plain that you’re looking to use your expertise in a new market, and that the potential client is one of the first you’re reaching out to.
More importantly, use your digital marketing expertise to suggest ways on how you can help them scale. Use data from your past experience to show them previous good results in other verticals.
Then offer them a deal where you either get paid on performance (i.e. paid a sum for each converted lead).
This kind of deal is very similar to the hybrid payment model we use with some of our clients.
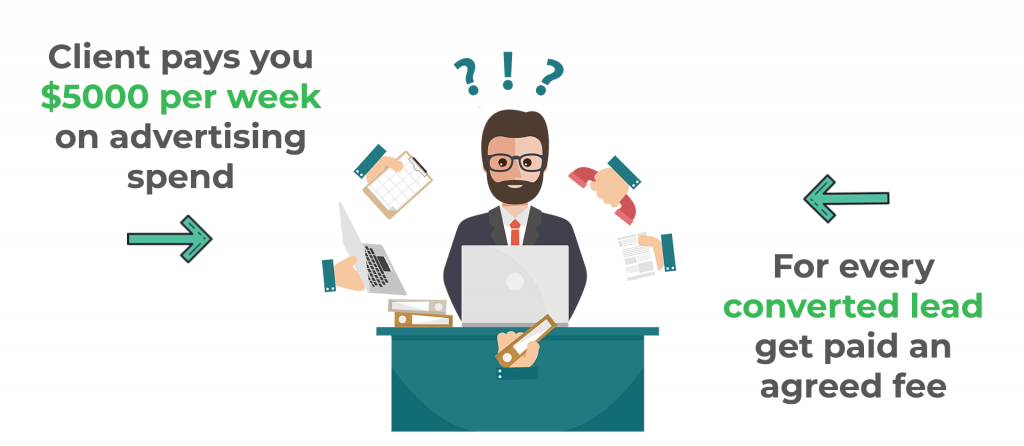
In short, with this model, you ask the client to pick up the advertising spend. You’re still responsible for building the funnels and running the ads, but you don’t have to shell out from your own wallet.
Say, for example, the client agrees to pay $5000 per week on advertising spend. It’s then up to you to generate as many high-quality leads as possible for that figure.
When the client receives the leads, the sales team will try to convert them. For every converted lead, you’ll receive an agreed fee.
Clients love this kind of deal because they know they’re getting plenty of bang for their buck.
A $25 lead may be worth $3000 once converted into a customer. If the client has agreed to pay you 10%, you’ll get paid $300 per converted lead.
And 10% is pretty low – I wouldn’t recommend going any lower. I’ve worked with the hybrid model on several occasions and, sometimes, I get paid up to 25% of the converted lead. It’s all about good negotiation.
Though you’re a beginner in this niche, present this offer to the client as if you’re giving them a golden opportunity.
In exchange for your expertise, you get to use this client as your guinea-pig. The client, on the other hand, won’t need to pay for any leads that don’t convert.
If you’re transparent with the potential client and make it clear you want to help them, you’ll find they’re usually quite receptive.


Show The Client a Pre-Built Funnel
If you can, show the client your worth with a pre-built funnel.
It may sound like a lot of work but, with tools like LeadsHook, Unbounce and ClickFunnels, you should be able to build something respectable within a few hours.
It may not be the “final funnel” (i.e. what you present to the traffic), but it should be enough to show the client that you’re serious.
I know that if I was approached, as a business owner, and someone had managed to build a model funnel in a day, that’s a good sign that this person is wanting to make things work.
If you like, you can also give a potential client a “sneak peek” into other lead generation websites you’ve built. This is an ideal way to show someone how you manage branding.
Below you will find an example of a pre-built funnel that we would show a potential client.
Use a Behind-The-Scenes Video
A third tactic we use is sending a potential client a “Loom” video, or a screencast of what goes on behind the scenes.
Clients like to visualise how a funnel works. In the video or screencast, we’ll show them one of our Facebook ads and what happens after the person makes a click.
This should take the client to the quiz or advertorial, or whatever is the next stage in your funnel. Then, use the video to “look under the hood”, and show them what the quiz or advertorial looks like in the creation software (LeadsHook, Unbounce, etc.).
Clients love getting leads they know will fit their criteria and that they’ll be able to close.
Talk to them about the benefits of the advertorial/quiz element of the funnel.
For example, you could explain that for every 100 people that hit the quiz, only 50 of them meet the client’s criteria. The marketing survey can segment those leads according to type, and only the ones that match the client’s needs will be delivered to them.
Essentially, this video shows the client your process. If the client can visualise what goes on, you have a good chance of closing that deal.
Intention Transparency
Finally, be transparent with your intentions.
The client isn’t a dummy. He/she knows that both of you are entrepreneurs, and both parties need to make money.
If the client can make $2000 on a closed lead, their cost per acquisition needs to be under $1000 to make a decent profit.
Tell the client that you can give them 10 leads for $50 each. For whatever leads convert, they’ll pay you 10%. This means that it will cost them $500 for a closed client, rather than $1000, which leaves them plenty of margins.
Meanwhile, if you can generate the leads for $25 each, this is a very scalable solution for the both of you.
If you’re transparent with your figures, and you can present them to the client in a professional manner, clients will get a better picture of the “end result”.
Still not sure of how to approach your client? Check out this video where I break it down:
So, that’s four tips on how to land clients in a vertical without testimonials or experience.
It is some hard work, but the results will be worth it – especially if you’re looking to branch out into a new niche (like one of the above).
And, of course, the harder you work now, the less hard you’ll need to work in the future.
Trust the process. In these economic times, an offer like yours is very much one that converts.
Now, let’s swiftly move onto the next section of this post: how much to charge per lead in your chosen niche.

How Much To Charge Per Lead And Get To $100k a Month
Once you have landed a client on a ‘performance based model’ (i.e. the grandfather deal mentioned above) and you have figured out your lead cost and quality, you can graduate to the full blown ‘Pay Per Lead‘ model with another client in the same vertical.
When people are new to the Pay Per Lead model, there’s usually some confusion on how much to charge per lead in their vertical.
Honestly, every industry is different, and there isn’t a one-size-fits-all answer. Most people eventually figure out their cost per lead after a few months of experience.
However, that method often comes at a cost. I’ve known people to plug away for months, only to find they’ve been making half the profit they could.
Luckily, I’ve come up with a simple calculation that can be used across all niches.
That said, this formula is a general rule of thumb only, so you should adapt your charge accordingly once you’ve racked up some experience.
The calculation goes like this:
• Work out the Average Order Value (AOV) of the customer. E.g. in some industries, a converted lead could be worth $3000.
• Divide the AOV by 3
• Figure out the 5% conversion rate.
3000/3 = 1000
5/100 =0.05
0.05 x 1000 = 50
So, if the AOV of a converted lead is $3000, you should charge about $50 per lead.
The opportunities for huge profit here are tremendous. If the client only wants a small order, like 100 leads a week, you could be making $5000 per week, from just one client.
This is just a ballpark figure, but it’s a good place to start.
If you’re still unsure about lead prices, you could compare the average price per lead on Google.
In SurveyAnyPlace’s helpful infographic, they have collated data from 22 influential lead generation articles to find the average Cost Per Lead in a selection of industries.
Here are the industries they looked at:
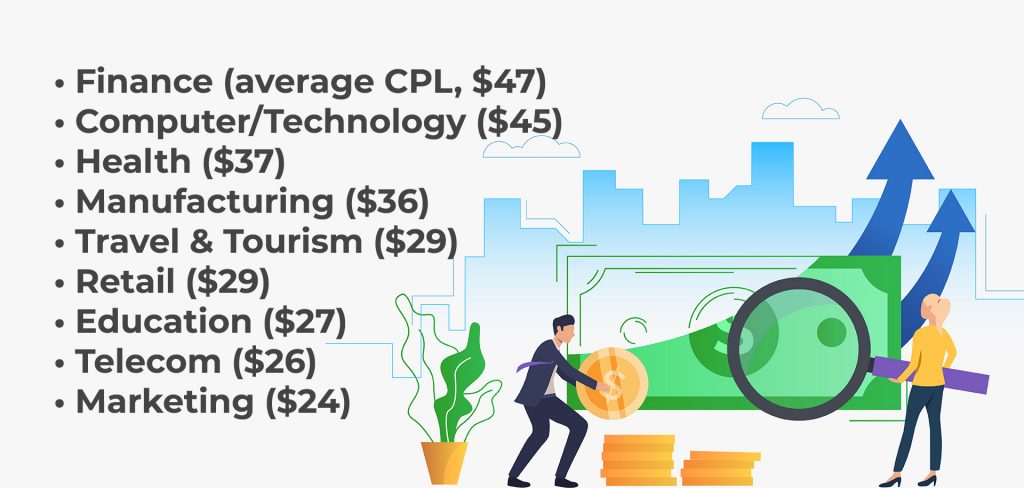
Of course, these figures reflect how much the average lead in that industry costs to generate, so you would charge your client more.
However, as you gain Pay Per Lead experience, you’ll find your CPL becoming much lower than the average. These figures include guys who have no idea what they’re doing, with almost zero experience in marketing.
As your CPL gets smaller, you’ll find yourself making bigger profits. It all comes with time.
Overall, I prefer my calculation method for working out how much to charge per lead. It may not be 100% accurate, but it will give you a solid figure as a starting point.
However, you can always use the above infographic (or other research) to see if you’re in the right ballpark. If, for example, you use my calculation and you think it’s too low, you can compare the figure against the above information.
Now you (roughly) know how much to charge per lead, it’s time to figure out how to distribute leads to your clients. And yes, you need to work this out before you start sending out any direct mail.
There are two main methods of lead distribution with Pay Per Lead:
- 1-2-1 client delivery
- Building a brand
In the step 3, I will explain how to do both. Let’s go!

Step 3: Building A Brand and 1-2-1 Lead Delivery
So, a Pay Per Lead agency can work in two ways:
1. You’re delivering leads on a 1-2-1 basis. This should be in just one niche when starting out. However, as you gain experience, you can branch out into two verticals or more.
2. You’ve set up a lead generation website and built a brand. This website concentrates on one niche, but can deliver leads to multiple clients. You segment the leads according to type, and supply them to your clients depending on their preferences.
1-2-1 Lead Delivery
1-2-1 lead delivery is exactly what it says on the tin.
You’ve closed a deal with a client, and agreed to send them a certain volume of leads – e.g. 200 leads a week.
Once you’ve generated these leads, they exclusively belong to the client. You can’t sell them to anyone else.
Of course, clients will expect a level of quality for these leads. This means you know what combination of ads, advertorials, landing pages and quizzes work. You’ve been in the field for a while, and your creative prowess is red hot.
If you haven’t got the required experience, try testing it out on “smaller” businesses first. They’re not great money-spinners, but they’re excellent practice for when you go after the big boys.
Or, you could refer back to the section on how to land clients with no experience in your chosen vertical.
So, this method is pretty easy. A client will ask you for 100 leads a week, 200 leads a week or 1000 leads a week. Basically, as many as you can manage.
You work out the cost per lead to be about $10 a lead. The client agrees to buy each lead for $25. They’ll pay you up-front, of course. I always ask for the money to be in my account by Friday, then I’ll switch on the ads the following Monday.
Now, all the leads you generate are for that client only. You can’t sell the leads to anyone else, and you have no rights to them after they’ve been produced.
If the client orders 200 leads a week at $25, costing you $10 a lead, then…
Done correctly, this certainly could be an extremely profitable way to sell leads.
If I had to whittle down 1-2-1 lead delivery into pros and cons, the list would look like this:
Pros
- You can leverage your client’s brand
- GDPR (UK) or data sharing (USA) is the client’s responsibility
- You can duplicate your funnels for other client’s and change the details to suit
- It’s the fastest way to start
- You don’t have to worry about financial service regulations
Cons
- You’ll have to deal with your client’s marketing departments (yawn)
- Ad and funnel approval can be painful
- A client can copy your stuff if they choose not to use you
- Overall, it’s more work, as you’ll be running new ads and building new funnels for each client.
Building A Brand
Building a brand is ideal for experienced agency owners who want to scale their business.
This method of lead delivery means you won’t be building hundreds of funnels for clients but can deliver leads to multiple clients at the same time.
Essentially, to build a lead generation brand, you need to make something called a lead generation website.
Lead generation websites focus on one niche. Instead of spending your time creating and recreating hundreds of sales funnels for individual clients, a lead gen website allows the agency owner to generate all their leads in one place. Then they can segment and sell those leads to various clients according to type.
You drive traffic to a lead generation website using a mixture of paid advertising (Facebook, Google, YouTube, Twitter), organic content and SEO.
The real game-changer with a lead generation website is the ability to segment your leads according to type.
For example, when you’re delivering leads to clients on a 1-2-1 basis, you need to keep in mind the qualifiers the client is looking for.
Variant A
Variant B
There are many variations of this, but you get the idea.
With 1-2-1 lead delivery, the leads under “Variant B” would be wasted. They don’t fit client specifications, so the client is unlikely to buy them.
With a lead generation website, you could sell these otherwise “wasted” leads to a client who can make money with that type of customer.
And the best thing? You can sell these leads to as many clients as you want.
The opportunities with a lead gen website are numerous:
- Multiple clients can be served from one website
- You only need one advertising account per brand
- More money, less time involved in the long run
- It’s easy to land clients with this type of offer
- If you’re good at SEO, you can get free leads around the clock
- You can sell these websites for $$ when you’re done with it.
I’ve had multiple students transfer from 1-2-1 lead delivery to building their own lead generation brand, and many of them have started scaling to over $100k a month.

BUT, to build a successful lead generation brand, you’ll need to make sure your sales funnels and ad campaigns are at the top of their game.
The best way to get a sense of what’s out there in your field is to reverse engineer your competition, and use your research to blow them out of the water.
Reverse Engineering Your Competition
A big worry for agency owners starting in a new niche is the sheer amount of competition.
If you’re anything like I used to be, you’ll:
- Spend ages agonising about other companies that have been in the niche for years. How can I compare? Is there any money to be made when some agencies have a decade or more of experience?
- Wonder what you can do to make yourself stand out. If you want to start making a name for your business, you’ll have to do something completely different to what the competition is doing. That’s logic, right?
Your competition didn’t reinvent the wheel.
They didn’t spend their precious time trying to be 100% original (then tearing their hair out when that strategy didn’t work out).
Your competitors got where they are today by borrowing and improving on the work of their peers.
When it comes to running paid traffic, you don’t have time to mess around. You’ve got to get it right (enough) the first time, or you could stand to lose some serious profit. With some clients, you only have about 7 days to prove your worth.
Being a master in any field means learning from the greats who came before you.
I’ve written an extensive piece on Reverse Engineering Competition in the Roofing Industry, but I’ll just take a quick look into reverse engineering for the benefits of this post.
What is Reverse Engineering?
Reverse engineering is when you take an object or idea, and then pull it apart to see how it works. Once you understand the process, you attempt to build a similar or advanced version of the original for your own gain.
Remember writing essays at school? The teacher would usually hand out a “model” essay to analyse and understand why it achieved top marks.
You’d then take a leaf out of that swotty student’s book, and try to write an equally good, or better, essay.
Though you didn’t know it at the time, that was a classic example of reverse engineering.
So, when you’re building a sales funnel for a client, there’s no need to reinvent the wheel (to begin with). Do your research by checking out your competitor’s sales funnels (ads, advertorials, landing pages, quizzes), and make note of what they’re doing well and what you could do better.
When you eventually build your own sales funnel, use your research to create something that blows the competition out of the water.
Reverse engineering saves you a ton of time and energy. Plus, the results are far better than when you struggle to come up with something “100% original”.
What Tools Can I Use For Reverse Engineering?
AdvertSuite
There are a range of tools available to help with reverse engineering, but we use AdvertSuite at Flexx Digital.
While this is not the best tool on the web, it is cheap and a great way to get started.
AdvertSuite is the “world’s largest database of Facebook ads that can show you “all of the current live and past Facebook ads that are winners in any niche”.
You can also use the tool to look at the ads’ “targeting countries, group ages, marital statuses” and any other key demographics that laser-target the intended audience.
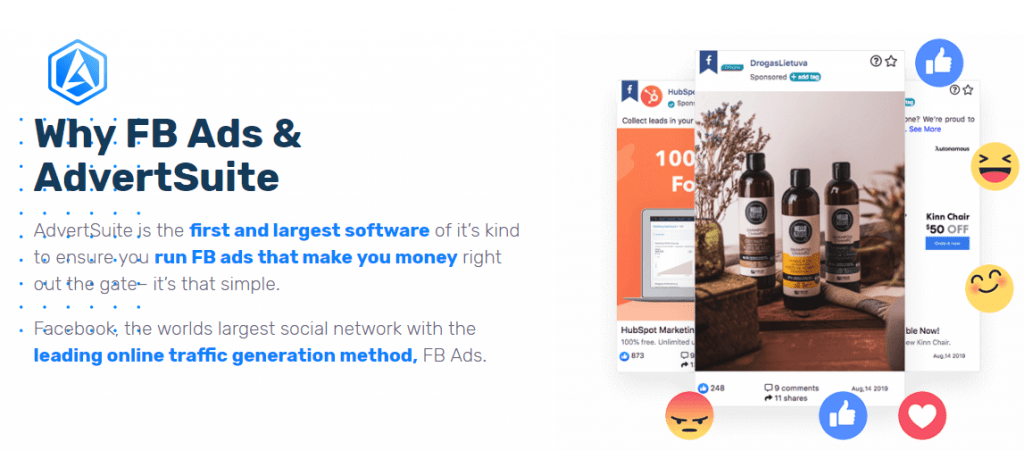
If you buy AdvertSuite’s basic package for $67, you’ll have over 40 million Facebook ads at your fingertips.
If you decide to splash out on the professional package ($124), you’ll also get access to millions of Instagram, Google Search and YouTube ads as well as Facebook’s.
Find out AdvertSuite’s pricing details here!
Features include:
- Being able to see the best performing ads on Facebook, Instagram, YouTube and Google Search in any industry
- Unlimited searches, bookmarks and usage
- Competitor breakdown – your competition’s ads and landing pages
- Geolocation filters
- Video and image ad integration
- Ad engagement, Likes, Comments and Shares
This is what AdvertSuite looks like:
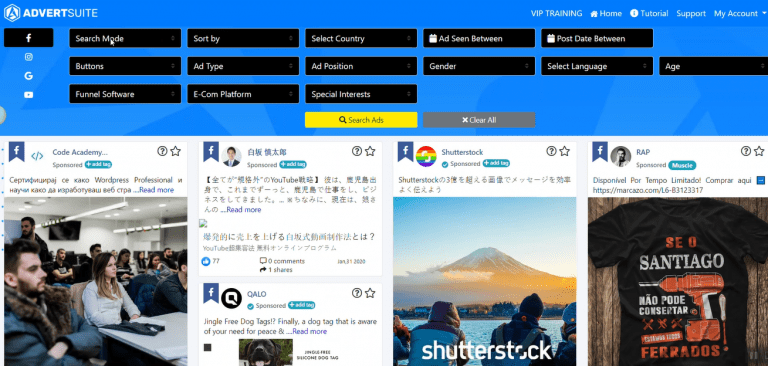
To find the main competitors in your niche, type in your keywords into the box marked “Keyword Type”. Click the box and select “Ad Text”.
Another box will appear, “Enter Ad Text”. Write your keyword in here. (see image below)
Next, select the country you’d like to view ads from, i.e. “United States”.

You can make your search as broad or as granular as you’d like. AdvertSuite also offers searches such as “Ad Type” (photo or video), Ad Position (news feed or side column), Gender, Language, Funnel Software (ClickFunnel or LeadPages); the list goes on.
If (for whatever reason) you don’t want to use AdvertSuite OR you want to use a complimentary program, you can opt for the following:
- PowerAdSpy (find out its pricing details here)
- AdEspresso (find out more here)
- Plain old Google search
Facebook Page Transparency/ Facebook Ads Library
Now you’ve taken a look at AdvertSuite, search for the Facebook pages these companies are advertising under.
Once you’ve found their fan pages, you can take a look at the ads your competition is currently running.
Though you won’t be able to see any stats about their ads (demographics, likes, comments), Page Transparency is a great way to see what ads your competitors are putting up on social media.

Google Search
Using Google Search is pretty self-explanatory.
Type your chosen keyword(s) into the search bar, and check out your main competitors from the top results.
But don’t just stick to the ads at the top of the page – studying organic content also has its place. After all, the top pages got to the top of Google search through excellent SEO and great content.
Watch the screencast video below to watch how I do it for the solar panel niche.
Okay, so you’ve researched the competition. By now, you should be all fired up and want to have a go at writing your own ads.
But first, let’s look into updating your offer on your LinkedIn and Facebook Profiles.
Updating Your Social Media Profiles To Match Your Offer
Now you’ve chosen your new niche, it’s time to update your LinkedIn and Facebook profiles.
You need to spend time on this, as it’s more important than you think. LinkedIn is the largest and most popular business-oriented social networking site on the web.
With over 300 million registered members, it’s usually the first port of call for employees, managers and prospects when researching a company or individual.
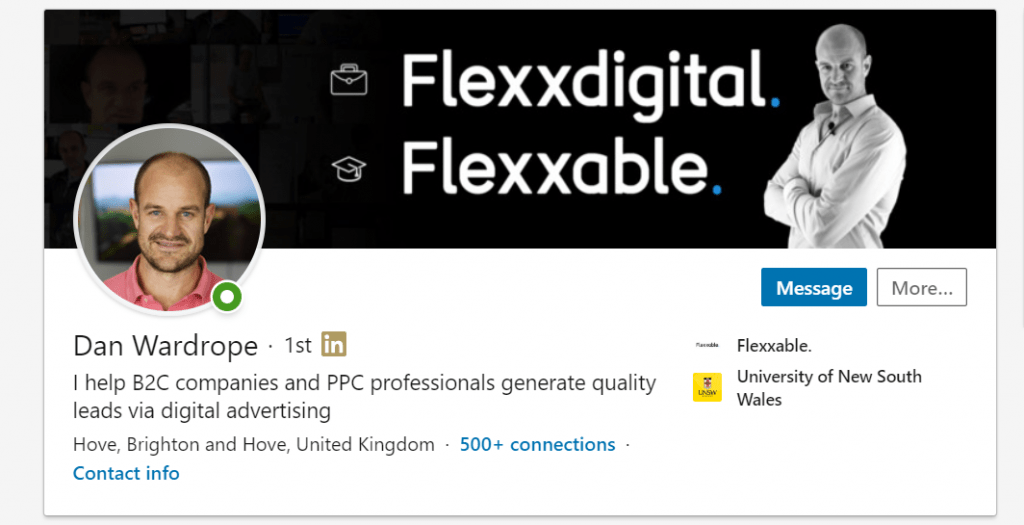
Your profile needs to be “niche-specific”. When you reach out to potential clients, they’re going to do their research – i.e. head over to your LinkedIn profile. You want to show these clients straight away that you operate in their industry.
Though I’m by no means a “LinkedIn professional”, I’ve spent tens of hours perfecting my message for prospective clients.
Today, I’m going to share with you a template containing the same material I used on my LinkedIn page.
Do not copy this word-for-word. Add your own experience and insights. Business owners tend to know when you’ve “copy and pasted” work from someone else, and it does nothing to help your agency.
Here’s the template for your brand new LinkedIn description:
Headline:
Would you be excited by getting 100 guaranteed “HIGH QUALITY” [niche] inquiries every day?
Body Copy:
As you are in the [niche] Industry, here is a no-risk offer from [Your company name]
Good quality leads are the life-blood of any company. And, we can generate these for you.
Over the past 7 years, my team and I have developed bespoke techniques and tools which consistently allow us to produce fantastic real-time web leads, and therefore results for our [niche] clients.
Our lead generation campaigns have been tried and tested. These ‘funnels’ have had 7 figure budgets thrown at them, and have been finely tuned accordingly.
Best of all….
YOU ONLY PAY FOR THE LEADS YOU NEED
There are NO upfront creative costs, NO upfront production costs and NO upfront setup fees, – this alone is an incredible saving of over £6000 alone!
And, to make this even better, you don’t have to pay a monthly management fee!
Are there any catches?
There are two:
1) We specialise in Business to Consumer lead generation – We don’t do B2B. [note change this to suit your niche]
2) If you decide to work with us, you must be capable of accepting at least 100 leads per week.
Now, I am not shouting about this to the whole world, so I can get ripped off by copycats and have the market flooded by cheap, ineffective copies. Not in the plan!
It’s for the exclusive, competitive advantage of my clients. This is top shelf, first-class lead generation.
So, let’s get connected.
Send me a short message saying, ‘I would like to know more’, and I will send you some more info on how this works. No pressure, no obligation.
I’d love to talk about results and ROI with you – it’s what I love to do.
So, if you need [niche] leads, you owe it to yourself to reach out to me. It could well end up being a very productive message! This is the real deal!
[Your Name]

It’s also important to update your personal Facebook page to match your new Pay Per Lead offer.
Your personal Facebook can be a powerful business tool. The process is pretty much the same as LinkedIn, but you have the opportunity to join “niche” groups and hunt for prospects.
If you find anyone you think may be interested in your offer, send them a friend request. Once they’ve accepted (and looked at your personal page), send them the adapted LinkedIn template above, via private message.
You can take a look at my personal Facebook page here.
With both Facebook and LinkedIn, it’s important to post regular content to your feed.
Whatever vertical you’re in, make sure that you frequently post content that isn’t ads. That can be articles, videos, photos, memes or little fun games like “Spot the Difference”, word searches and arrow words, all of which we’ve tested on our fan pages.

Flexx Digital also does the occasional live stream on Facebook. The average user will spend 3x longer watching a Facebook Live video in comparison to a pre-recorded one.
Don’t have the time or resources to make your own posts? It’s perfectly okay to take relevant articles and videos from other places on the web, as long as you don’t pass them off as your own.
Take 25 to 30 articles and spread them out over a couple of weeks. You can do this manually, or save yourself time by scheduling the post. Just write what you want in the status box, with any relevant links, then click the drop-down menu and select “schedule” instead of “share now”.
For posting frequency, we find that the golden number is about two to three times a week.
So, you’ve found your niche, updated your Facebook and LinkedIn profiles, researched the competition, and decided whether you want to build a brand or do 1-2-1 lead delivery.
You may have already started to reach out to clients advertising services in your new vertical.
Great work!

Step 4: Knowing Thy Customers with Avatars and Empathy Maps
In order to build a sales funnel worthy of your (soon to be) 7-figure agency, you need to first know your potential client’s customer and exactly what they want.
When people start dipping their toes into the world of digital advertising, avatars and empathy maps often get done poorly, or not at all.
I would advise that any time you are entering a new vertical or niche to SLOW DOWN and take your time.
Understanding the audience you are showing ads to is key to generating good quality leads, at a great price.
Let me give you an example:
Which ad below cuts through the noise and catches your attention,
1. Click below for the best Private Medical Insurance Quote. We compare the market and guarantee you the lowest price.
or
2. Most business owners aren’t aware that their business can pay for their private health insurance BEFORE tax. There are also a select few insurance companies who will pay for your gym membership as part of your package, but not all do! Click below to find out more and see if you and your family qualify.
Unless you know the market like the back of your hand, you would never be able to write ads like ‘number 2’, which speak directly to a particular audience that would be highly interested in the offer.
Make sense? Don’t skip this step!!
1. Building a Customer Avatar For Your Ads and Lead Generation Funnel
With a customer avatar, you’ll be able to:
- Develop the copy for your sales funnels
- Speak directly to your target audience
- Work out who to avoid at all costs (there are people like this in every market)
- Save a lot of time and money in the long run.
Here’s how to do it:
Your Customer Avatar is a detailed profile of your ideal customer. Not a group of people, but a single person you think needs your product (for example, the business owner I mentioned above).
Your finished avatar will look something like this:
Here are the key elements you need to include in your avatar:
- Name
- Gender
- Age
- Location
- Income
- Education
- Occupation
- Interests
- Online behaviours
- Goals
- Pain points and struggles
As you can see, these are all crucial features for understanding how to target your audience in your social media ads.
To complete your customer avatar, you’ll need to do some extensive market research.
There are a few ways to get started, and here’s a quick list:
1. Start with your client. They should be able to answer all your questions based on stats from their vast experience. Ask questions like: “What are your ideal customer’s demographics?”, “What are the benefits and features of your product/ service?” and “How does your product/service fix a customer’s pain points?”
2. Check out the competition. You should have already done this at the reverse engineering stage. Google is the ideal place to start. Look up forums and websites relating to your product/service and see what potential audiences have to say about their problem. How can you use their views, worries, fears and wants in your social media/ Google search ads? How can you position your product or service as the solution to their issue?
3. Join Facebook fan pages and groups. If people are interested, passionate or worried about something, there will be a Facebook group about it. Take note of the type of content posted on the page, what members ask each other, and whether people are looking for practical advice or sympathy.
4. Create a survey. The best way to find out what your customer is thinking is to ask them directly. Make sure the survey isn’t too long. Ask a mixture of demographic and psychological questions. You can create surveys for free on SurveyMonkey.
Put all the information into a Google doc, and use it to shape your customer avatar. When it comes to writing your ads and creating your funnel, you’ll find you know your customer inside-out.
2. Building an Empathy Map For Key Psychological Insights
While an avatar focuses on the habits and features of your ideal customer, an empathy map deals with customer mindset.
Essentially, a Customer Avatar will help you with your demographics, while an empathy map will provide the foundation for your creative.
The best way to nail the creative aspect of your ads? Tap into the emotions of your audience.
Empathy maps look like this:
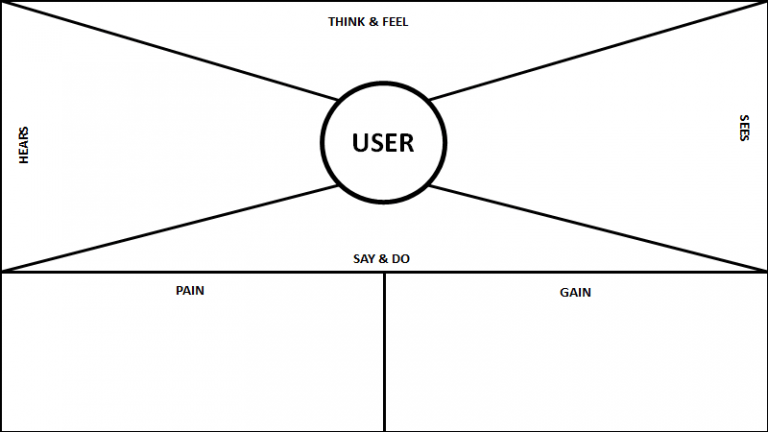
They’re divided into six sections, with your ideal customer’s name and picture as the centrepiece.
Take notes on what your customer:
- Hears (i.e. from friends, family, other advertisements, online)
- Says and does
- Sees
- Their pains (what is their biggest pain point right now? How does your product or service solve it?)
- Their gains (what will they do once the problem is fixed? How does your product/service improve their life long-term?)
- The idea is to fill the empathy map with as many thoughts as possible. You can do this on your own, or as part of a team. Refer to your Customer Avatar research to help you dive into their emotions.
If you’re doing the empathy map as a team, draw the above template on a whiteboard or flipchart. Give each team member a set of post-it notes (different colours for each member).
Fill up the board with your ideas. Team members should come up with at least two ideas per section. If you’re doing the empathy map as a form of team training, remember to give other members access to your Customer Avatar, research, data and statistics.
Still having trouble? Check out my video below where I show you how to find your ideal customer using the methods I mentioned above.
When you are finished, you can move on to the next section, building your brand and sales funnels.
Building Your Brand
Earlier on in the article, I talked about 1-2-1 lead delivery vs building your own brand, and the pros and cons of each.
If you have decided to build your own brand, this section will help you do just that.
When I talk about building a brand, I mean setting up your own lead generation website.
The purpose of a lead generation website is to take any visitors – cold or pre-warmed – and turn them into a hot lead.
Lead generation websites encourage visitors to make online enquiries about the product or service you’re offering. The visitor is directed to your lead gen website via your sales funnel (more on that in a moment).
Many lead generation websites offer a small free gift – such as a whitepaper or free consultation call – to get the visitor to hand over their contact details. Once the site has access to the visitor’s telephone number or email address (aka, a lead), it’s up to the sales team to turn that lead into a customer.
Here are the 5 key elements of a lead generation website:
1. Call(s) to action
2. Conversion form/marketing quizzes
3. Informative content about the product/service
4. A clear value message
5. (Hidden) analytics to measure leads and click-backs.
Lead generation websites are usually focused on one niche. Instead of spending your time creating and recreating hundreds of sales funnels for individual clients, a lead gen website allows the agency owner to generate all their leads in one place. Then they can segment and sell those leads to various clients according to type.
How Does a Lead Generation Website Work?
The key to a successful lead generation website is lots of traffic. We want people to be able to find the website, give their details, and welcome contact from whatever clients we’re advertising for.
As you know, there are multiple ways to generate traffic:
- SEO
- Organic content
- Paid ads
- A mixture of all three
Ideally, a strong mixture of the three would be the best way to generate traffic to your site. SEO, in particular, means the website is “evergreen” and will continue to generate leads without paid ads.
However, organic content can take months to see results and SEO requires serious skill (plus a few months to get up-and-running).
Paid ads are the quickest way to generate traffic for your lead gen website and brand. If you want to be a serious player in the lead gen world both you and your client must be prepared to spend a bit of money.
Then, once you’ve got your paid ads driving traffic to your lead generation website, you can start segmenting and distributing your leads to various clients.
Using Your Brand Page to Segment and Distribute Leads
When a visitor hits your lead generation page, you have several options. For one, you could direct them to a form and take their details. That’s the most basic way of “producing a lead”.
However, you’ll find that lead generation forms don’t discriminate on the grounds of quality and type. For every “hot” lead generated, you’ll find 100 that don’t fit your clients’ criteria.
Using marketing quizzes on your lead generation website will help you segment leads effectively for your clients.
Say, for example, your website is built for solar panel installation leads.
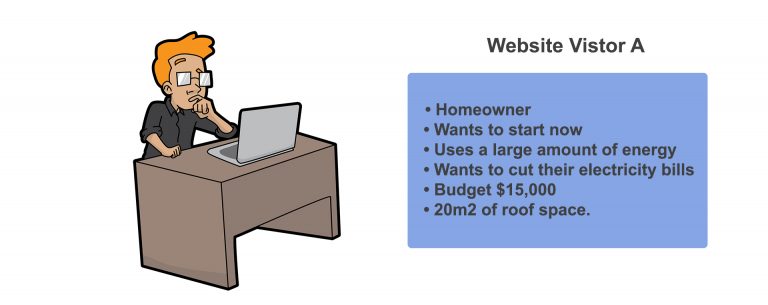
Visitor A put answers corresponding with that information into the quiz. The customer is then directed to Client 1, who wants that type of lead.
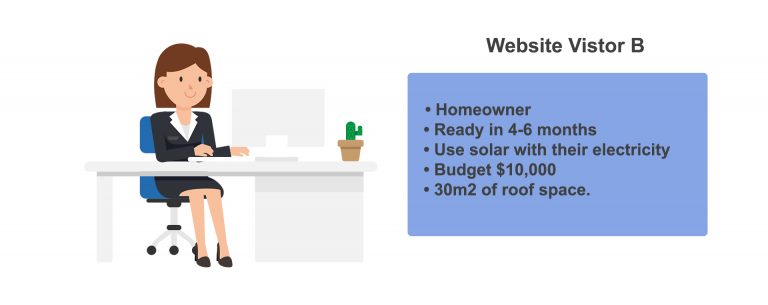
This customer is directed to Client 2, who can make their money from that type of customer.
And so on. This type of lead segmentation can go on for as many clients as you have in that vertical. Using the power and versatility of a lead generation website, you can monetise every lead that comes your way.
Remember – every client will want something slightly different, depending on their needs. It’s crucial you ask exactly what they’re looking for before you start delivering leads to them.
The Other Benefits of Lead Generation Websites
As well as being incredibly profitable, a well-made lead generation website can be an valuable investment. 💲
Think about it: a good lead generation website comes with an air-tight sales funnel, a landing page, and a lead-segmenting system all in one fell swoop. If your lead generation website is versatile and profitable enough, many clients will be chomping at the bit to buy you out.
They’ve seen your success, they know you can generate great leads – and they’ll do anything to keep those high-quality leads away from the rest of the competition.
Selling up or not, it’s a win-win for you. Either way, you’ll be making a lot of money!
An example of an incredibly successful lead generation website is CompareTheMarket.com. As they’ve grown, they’ve managed to build one site around two niches (insurance and utilities). Within that, they’re targeting customers within eight micro-niches:
- Insurance
- Vehicle
- Home & pet
- Life
- Business
- Travel
- Utilities
- Broadband
- TV & phones
- Energy
- Money
If you can emulate even a fraction of the success, in one niche, of CompareTheMarket, you should be holding the reins of a 7+ figure agency in no time.

Step 5: Building the Lead Gen Funnels That Sit Behind Your Brand
Inexperienced marketers create funnels that consist of two main elements:
- The ad
- The landing page
And that’s great! If you want to lose a tonne of potential leads, and waste time calling hundreds of unqualified, uninterested people.
Unless your product is something immediately appealing (like clothes, food or furniture), you’ll need a multi-layered sales funnel to generate high-quality leads with a great contact rate.
A sales funnel needs to address and solve the following 4 stages of a potential lead’s journey:
- Awareness
- Interest
- Decision
- Action
Or, for a useful acronym, AIDA.
Each of these stages requires a different approach from you, the marketer, because you don’t want to send the wrong message at the wrong time. You also want to minimise the risk of “losing” your lead during any stage of the sales funnel.
So, let’s go briefly back to the ad/landing page sales funnel type. If you put that particular sales funnel strategy against AIDA, you’ll see that it’s only hitting the Attention and Action sections of the customer’s journey.
And there’s the problem. This type of funnel isn’t giving the customer enough information – and definitely not enough credit.
It’s kind of like asking someone to buy a second-hand car without taking it for a test-run. You just wouldn’t do it.
Let’s look at each stage in some more detail:
Awareness
This is the stage where you first catch a lead’s attention. This is usually in the form of an ad, whether it’s on Facebook, Twitter, YouTube or Google Search.
Here, the prospect is only just becoming aware of your existence and what you offer.
Again, if you’re selling clothes or something similar, you may find that the customer is ready to buy straight away.
For many (all) of you, that won’t be the case. Though the niches I’ve talked about in this post are extremely profitable, they’re often more than a mindless purchase. The more money something costs, the harder the marketer will have to work to convince people to buy.
Occasionally, a prospect will see an ad for something like solar panel installation, and will want to buy/register their interest immediately. They’ve already done their research, and they can see you’re offering exactly what they want at a reasonable price.
That’s excellent – but these prospects will only be a tiny, tiny percentage of your overall lead pool.
More often, the awareness stage of your funnel (the ad), is the beginning of a courtship. You’ve captured their attention, and now you need to woo the prospect into engaging with your service.
Interest
If your ad has done its job, you will have captured the attention of your target customer.
But, at this stage, 75% of people are craving more information, not reaching for their wallets.
So, now it’s your chance to educate the public on your product or service. You need to leave your visitors with:
- More information than they’ve encountered before (giving them value)
- A guarantee that you’re a legitimate company and not another scam
- A hunger for your product/service
See, once a customer is interested in your offer, they’ll start making decisions about it.
Consumers at the interest stage are doing their research, comparison shopping, and thinking over their options. At this point, it’s time to offer content that helps them but DOESN’T sell to them.
If you’re pushing your product or service from the get-go, you’ll chase prospects away. Now’s the time to establish your expertise and help the prospect make an informed decision.
I’ll tell you how later on.
Decision
At this stage of the funnel, the prospect is seriously considering getting ready to buy. They may be considering two or three options – and, hopefully, one of them is you.
This is the time to knock it out of the park with your best offer. That could be something along the line of:
- A free “guide” to your product or service
- An informative PDF that relates to your product or service in some way
- A free consultation call or quote
- A discount code
- A bonus product
Whatever you choose to reel-in that prospect, make sure you run it past your clients first. The offer should be so irresistible that your lead can’t wait to take advantage of it.
To get their “free gift”, the sales funnel should be set up so the prospect has to hand over their personal details.
That could be an email address, telephone number, or whatever the client needs to make contact.
If your offer is successful, the prospect has now become a lead. Excellent work!
Action
At the very end of the sales funnel, the customer takes action. They purchase the product or service you’ve offered them, and become a client’s valued customer.
But, wait. You’ve already turned them into a lead, right? Surely the rest is down to your client’s sales team?
Turning a lead into a paying customer depends as much on your sales funnel as it does the sales team.
Did you know, for example, that a well-designed Thank You page in your funnel can increase customer conversions by 47%?
Adding a thank you page is a prime opportunity to provide your lead with any last-minute info or put any lingering fears at rest. If you’re selling a service, like health insurance, this is your chance to remind the lead of all the benefits.
Likewise, a Thank You page is a brilliant opportunity to cross-sell or upsell another (relevant) service. Remember, you need to ask your clients whether they’re happy with this, before you proceed.
A good Thank You page will contain as much info as possible to get your lead to complete the buying process. This includes information on:
- WHEN to expect their confirmation email for their “free gift” (over the next minute, hour, day, etc.)
- WHERE to expect it (i.e. a reminder to check their spam)
- WHAT to do if they don’t receive it (provide a customer helpline or address)
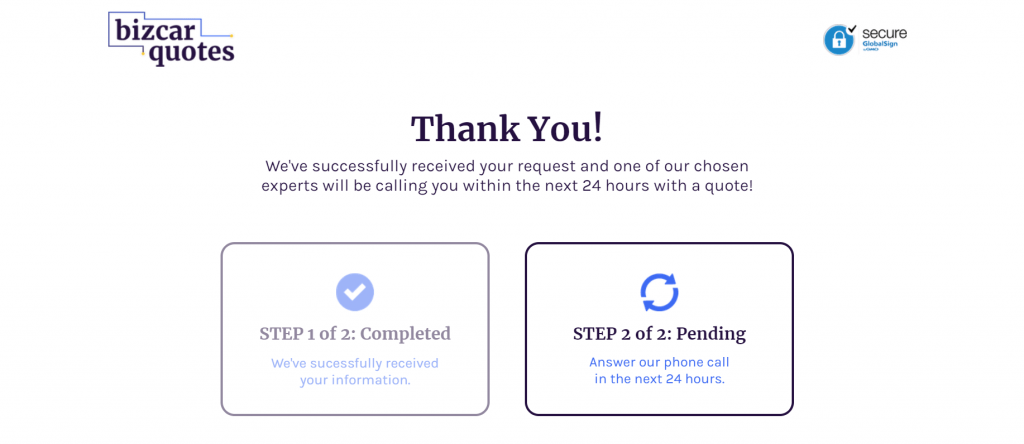
The same goes for any other form of promised communication. If you have guaranteed your prospect a phone call, tell them every detail they need to know.
- WHEN to expect the phone call (today, tomorrow, within 15 minutes, etc.)
- WHAT number you will be calling from
- WHO the customer can expect to speak to
- WHAT you’ll be covering over the call and WHAT resources your customer will need (aka payslips, bank details, solicitor letters, etc.)
The more details you provide, the safer the prospect will feel making the commitment. If you’re true to your word, the prospect will know you’re reliable and make the transition into a paying customer.
Plus, If you’re building your sales funnel on a single-sales basis, you are definitely leaving money on the table.
Once a prospect has hit your thank you page, it is 50% easier to sell them another product or service, in comparison to advertising to cold traffic.
An excellent example of a cross-selling enterprise is Amazon.co.uk. Once you’ve bought a product, Amazon will always send you a “Thank You” note, with more items in the “Recommended For You” section.
A whopping 35% of Amazon’s sales come from cross-selling or upselling, and 60% of customers buy again from the “Recommended For You” straight after they’ve purchased the first product.
If your client is selling a service, think of ways to apply a cross-sell or upsell. Taking Funeral Plans as an example, give your leads the chance to upgrade to the premium version. Or, you could offer them another phone call for a “special fixed price”. Chances are, if the prospect is interested in health insurance, they may also be interested in funeral plans.
Always check with your client before you attempt to cross-sell or upsell on your Thank You page.
So, What Makes a Good Sales Funnel?
Now we’ve broken down the sales funnel stages, we can see that the main element missing from the “ad to landing page” variant is the interest stage.
As I said previously, 75% of prospects want more information after seeing your first advertisement.
So, taking into account the fact that you also need a Thank You page, your sales funnel steps are looking like this:
Ad
Advertorial/Marketing Quiz
Landing Page
Thank You page
I have two methods for covering the “interest” step – either a marketing quiz or an advertorial.
What Is An Advertorial?
A blend of an advert and an editorial (advert + (edit)orial = advertorial, see?), an advertorial is essentially a long copy advertisement that provides real value to the reader.
Say you’re reading the Daily Mail Online. You’re browsing the news, when you come across an interesting article about freshly cooked food that gets delivered straight to your door.
It reads like a newspaper article.
It looks like a newspaper article.
Except… it’s not a newspaper article. The call-to-action at the bottom suddenly makes the article read, well, like an ad.
An informative article with an agenda? Say wha’? Advertorials, also known as native advertising, are a tiny bit sneaky… in a way.
Essentially, advertorials are long copy advertisements that provide the reader with real value in the sense that they solve a reader’s specific problem. They also ask the reader to take a specific action that benefits a business – such as buying a product or becoming a lead.
A formula to keep in mind for a successful advertorial is:
Advertorial Example
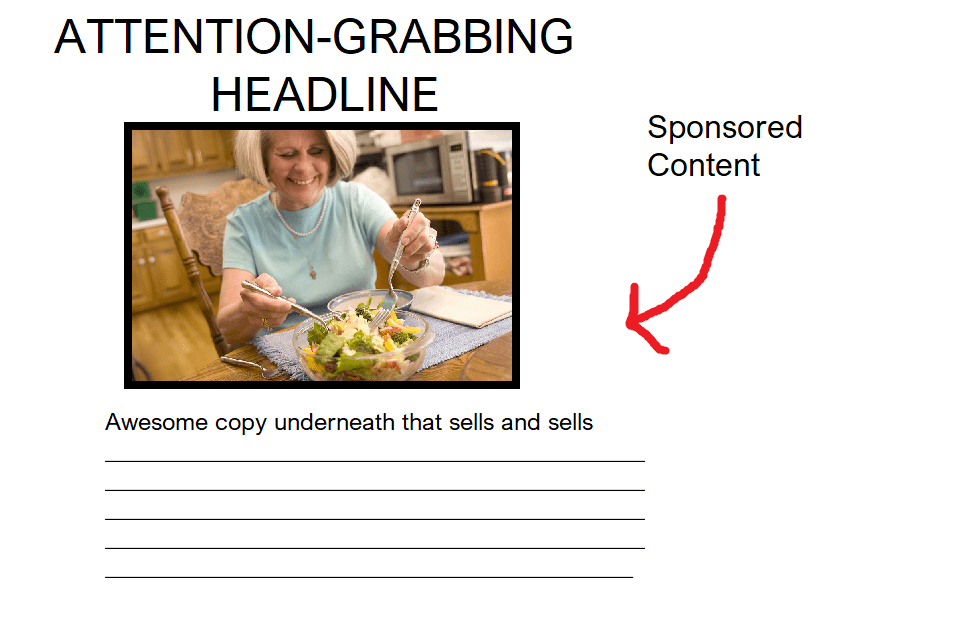
Let’s take a look at an advertorial written by the Father of Advertising himself, David Ogilvy:
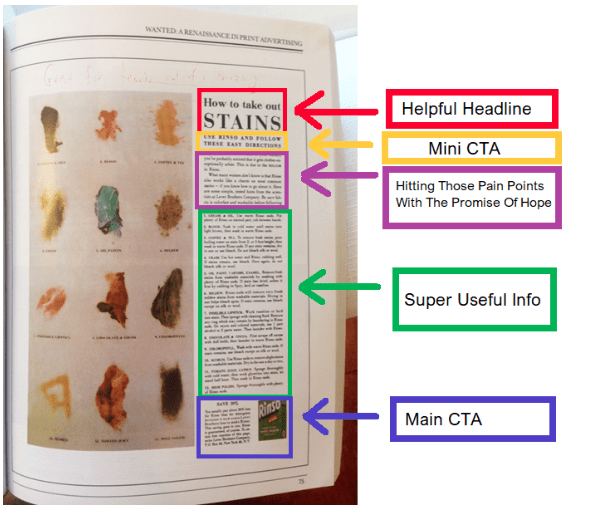
You can see a full copy of Ogilvy’s Rinso advertorial here.
As you can see, Ogilvy’s advertorial encompasses the “article crossed with an ad” approach.
He has used a:
Helpful Headline
Stains are a problem that affects everybody.
Notice that Ogilvy hasn’t headlined his piece with “BUY RINSO, #1 DETERGENT”, as that doesn’t provide any value to the reader. Instead, he’s positioned his long-form ad as a “How To” article – instantly more helpful.
Mini CTA
Use Rinso and follow these easy directions
The first mention of the product. This comes a little earlier than in some advertorials, but it’s still masterfully done.
Notice he doesn’t say “buy Rinso”. That would be heading towards “me, me, me” territory. Instead, he places the product in the form of a suggestion and a solution. He didn’t say “Rinso is better than any other detergent on the market” because he didn’t have to.
Pain Points
What many women don’t know is that Rinso also works like a charm on most stains – if you know how to go about it.
Sometimes, no amount of pre-rinse washes will get rid of stubborn stains – as housewives in the 1960s knew well. However, Ogilvy promises a tried-and-tested method for each stain that will solve this aggravating problem.
Super Useful Info
The next 70% of Ogilvy’s advertorial contained super useful info – telling the customer how to use the detergent to get rid of certain stains. E.g. for coffee, you soak the item in a tub of water mixed with Rinso. For grass, you apply a paste of Rinso (the detergent with a splash of water) directly onto the stain.
Can you see why this is so much more valuable than a generic “buy this detergent” ad?
Main CTA
“Save 20%. You’ll usually pay about 20% less for Rinso than for detergents because it now costs Lever Brothers less to make Rinso.”
So far, Ogilvy has written about Rinso’s features. It’s a detergent that gets rid of tough stains. Great, but that’s why people buy detergent.
However, Rinso also comes with a benefit: it’s the best of the best, and it saves you money. This is value layered on top of value, and it’s extremely seductive to the customer.
The CTA also invites readers to take a specific action – go to the store and buy Rinso (saving 20% in the process).
Though advertorials may differ wildly in subject and style, they all follow the same basic pattern:
- Headline and hook
- Pain points with the promise of hope
- Information that educates
- Mini CTAs throughout
- Directly address concerns
- Main CTA (30%)
If you want to find out more about advertorials, then I’ve written a super-detailed post which you can read here. How To Write Awesome Advertorials That Sell and Sell
Marketing Quizzes
With marketing quizzes, you’ve got to ask the right questions. A well-structured quiz in your lead generation strategy can uncover all sorts of information about your prospects in a way you couldn’t through a form, or any other static form of marketing.
Below is an example that we use at FlexxDigital:
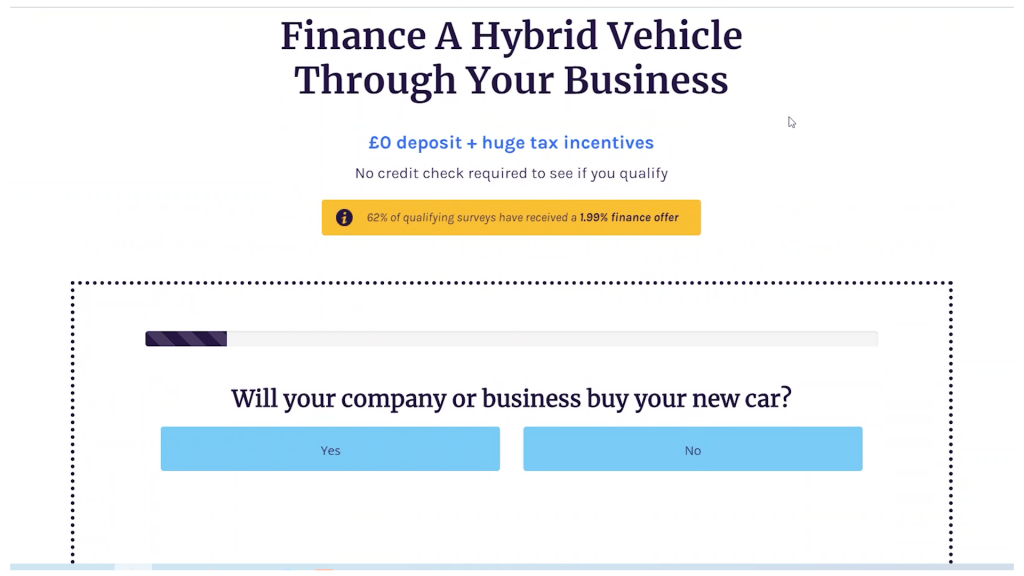
And audiences are fascinated with quizzes, no matter how humdrum the questions may be. Questions aggravate the brain, acting like tiny little fingers directly prodding you right in the grey matter. You feel like you owe the quiz answers, even though you’re the one who made the click in the first place.
Plus, there’s the promise of a reward, even if it’s really, really small. For example, say you’re building a landing page quiz for a solar panel installation company.
As quizzes go, the one you’ve made is straight to the point: How Much Could You Save on Solar Panel Installation? Get Your Free Quote Now.
Putting yourself in your customer’s shoes, searching for a reputable solar panel installation company can be exhausting. The installation itself can also be very expensive – so potential customers will be keen to save money when they can.
Then they come across your quiz and – oh, hello – there’s hope. Just by answering a few questions, your in-debt online user can see if there’s a glimmer of light at the end of the tunnel. If the quiz leads to a positive outcome (like, “yes, you can save up to $2000 on solar panel installation”), then you’ve made a brand new friend (and, more importantly, another lead).
The point is, marketing quizzes engage audiences through interaction. Because this engagement is voluntary, rather than forced, the information you can acquire through quizzes will always beat the information you get via other means.
Using Marketing Quizzes To Segment Your Leads
Marketing quizzes aren’t just great for generating leads, they’re also perfect for lead segmentation.
See, not all leads are equal. Out of every 100 leads your marketing quiz manages to generate, probably only 20 leads will be ready to take action right away.
The other 80 leads will need to be nurtured a bit. Let’s go back to this question:
[Name], Would you be ready to speak to one of our qualified solar panel installation companies tomorrow?
All of the people who selected B, and some of those who chose C, need to be segmented into a nurture sequence. You know that they’re interested in solar panel installation, or they wouldn’t have taken the quiz or handed over their email address. However, they’re not ready to take action this very moment.
These aren’t “wasted” leads.
Segment these people into an email autoresponder sequence to warm them up, providing them with advice, tips and valuable resources on how solar panels can benefit them – i.e. saving money on utility bills. Since the content matches their interests, the consumer is more likely to open the email.
In three to six months, open up the offer again. Ask them if they’re ready to speak to a qualified debt expert, and guide them towards scheduling an appointment.
It may take a little longer, but the email addresses of the unsure are just as precious as the ones ready to take action right away.
Using Marketing Quizzes For Retargeting As Part of Your Sales Funnel
Use the information you’ve acquired from your marketing quiz for events-based retargeting.
If you have a 12 or 13-step marketing quiz funnel, it could be that several quiz takers get through the first eight or so steps, then drop off.
However, within those first eight steps, you find out several golden nuggets such as:
- They’re male
- They’re a homeowner
- They’ve got a $15000 budget for solar panel installation
Using that information, you can fire events within a good lead software like LeadsHook, and then build a custom audience from the data you find.
Once you’ve built your audience, you can use your creative juices to make some hyper-tailored ads that speak to the audience on a personal level. You’ve got all the power behind you, as you know precisely what these people want.
When the custom audience sees these ads, it’ll be like you’re directly answering their prayers. As a result,your Click Through Rate (CTR) will skyrocket, lowering your CPA and producing premium quality leads.
You’ve got all the information you need. Use marketing quizzes in your lead generation strategy and the world’s your oyster!
So, at this point, you know exactly what you need to put in your sales funnel to generate high-quality leads:
- Ads
- Advertorial/Marketing Quiz
- Landing Page (i.e. your lead generation website home page)
- Thank You page
Step 6: How To Set Up Your First Facebook Ad Campaign
When it comes to paid ads, the world is your oyster. At Flexxable, we use a range of ad platforms, such as:
- YouTube
- Google Search
- Yahoo Gemini (or Verizon Media)
As digital marketers, you already should have some experience working with ads across at least some of these platforms.
In this post, I’ll show you how to use Facebook, Twitter and YouTube to set up your advertising campaigns, starting with Facebook.
Lets go!
Facebook Paid Ads
In this section of the post, we’ll walk you through the process of setting up your first ad campaign in Facebook Ads manager.
What Is Facebook Ads Manager?
Pretty straightforward – the Ads Manager is where you go to create and manage your Facebook campaigns. Ads Manager allows you to take several actions, such as:
- Set up Facebook ad campaigns
- Create new ads and ad sets
- Manage Facebook ad bids
- Target your Facebook audiences
- Optimise your ad campaigns
- Keep track of your ads’ performance
- Split-test your Facebook campaigns
- How To Use Facebook Ads Manager
If you’re not familiar with Facebook advertising, the Ads Manager could be accused of being user-unfriendly.
You’ll see that the Ads Manager screen consists of four main tabs:
- Account overview
- COVID-19 Resources (recent addition)
- Campaigns
- AdSets
- Ads
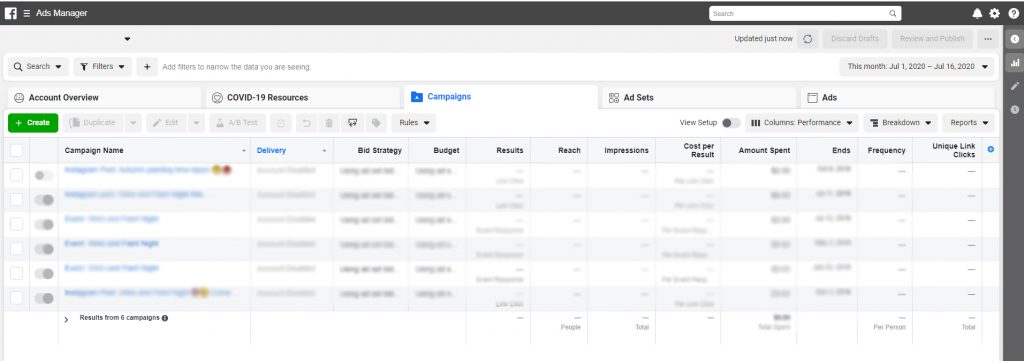
When exploring Ads Manager, you’ll notice that there are various tools for you to play with.
All advanced reports, saved and custom audiences, pixels, etc., are in there. If you hover over the “All Tools” button at the bottom of the screen, you can view all of the creation, planning and measurement tools you’ll need for your campaign, as well as the settings for your ad account.
How To Set Up a Facebook Ads Campaign
To create a Facebook ads campaign, you need to be on the “campaigns” tab. From there, click on the green “+ Create” button to start a fresh campaign.

Facebook will guide you through the creation process. Once you’ve clicked the “+ Create” button, you’ll see this screen:
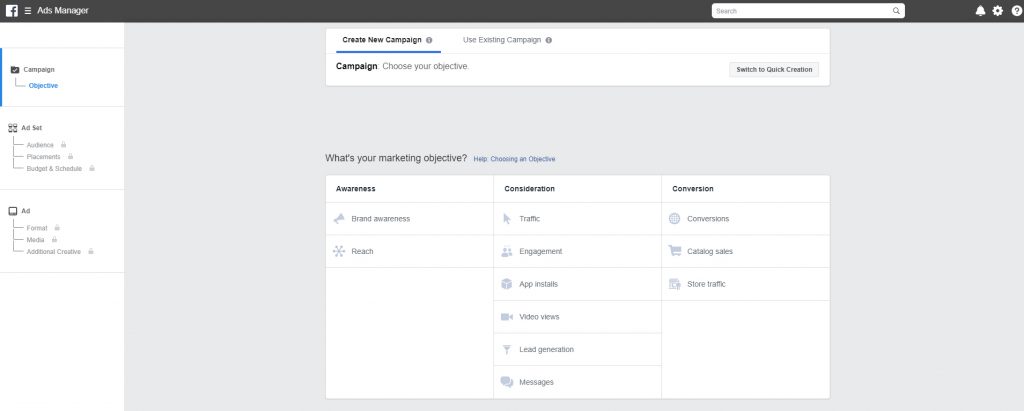
Don’t be daunted! It’s less complicated than you think!
1. Select Your Campaign Objective
Facebook allows you to choose from a range of campaign objectives to help you match your advertising goals.
Say, for example, you’re looking to build a reputation for your brand. You would select “Brand Awareness” from the given list.
If you’re driving traffic to a website (like a lead generation website!), you should click on “Conversions”.
Here’s a list of all of Facebook’s campaign objectives:
- Brand awareness
- Local awareness
- Reach
- Traffic
- Engagement
- App installs
- Video views
- Lead generation
- Conversions
- Product catalog sales
- Store traffic
- Messages
How to choose your campaign objective?
Obviously, choosing a campaign objective is vital. Facebook uses this information to determine your available ad formats, bidding options, and the way it will optimise your campaign.
Select the objective that best reflects your desired outcome. If you’re running a lead generation website, we recommend that you choose “Conversions” not “Lead Generation”.
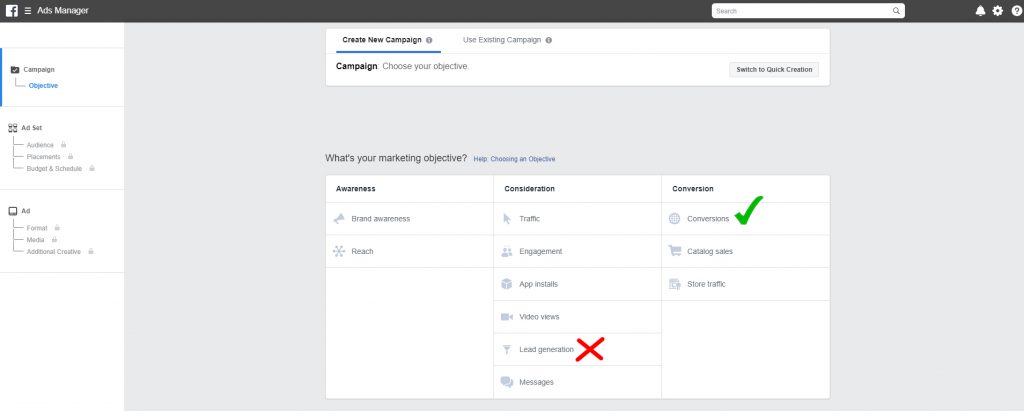
Let’s create a “Conversions” campaign together.
2. Start With an Ad Campaign Name
Once you’ve selected the type of campaign you want, you need to choose a name.
Naming your campaign appropriately is vital. Chances are, you’ll have many campaigns on the go at once, so an easily-identifiable name will help you organise and scale them as your agency grows.
A well-chosen name will also help you with reporting later on, when it’s time to analyse your results.
We recommend that you include the date-range of your campaigns in the name. You can also add other features to make the name easily identifiable, such as:
- Client name
- Target audience location
- Audience name
- Ad type (single image? Video?)
- Facebook fan page name
And so on.
This may seem overly-fussy, but it will definitely help you keep your campaigns organised in the long run.
After you select your objective, you can also choose to split-test your campaign. Split-testing, or A/B testing allows you to run experiments and collect data on your best performing campaigns.
I’ll go more into split-testing later on in this post.
Now, let’s get onto Audience Targeting.

3. Audience Targeting for your Facebook Campaign
Facebook offers lots of powerful ways to target audiences. This is the step where you’ll create your adsets.
Ads and adsets are contained within your campaign. The ads contain the creative, and an adset with information on the audience and the budget.
In this phase of your campaign, you have two options:
- Create a new Facebook target audience
- Use a saved audience
For later campaigns, custom or lookalike audiences are other extremely powerful targeting options.
Lookalike audiences are people who are likely to be interested in your product, service or business, because they already closely match your best existing customers.
Essentially, lookalike audiences go far beyond the usual targeting options, such as demographic and geographic.
In fact, lookalike audiences are currently the most powerful targeting tool for finding your ideal customer.
With both custom and lookalike audiences, you can use something called the Facebook Pixel. A Facebook pixel is code that you place on your website. It collects data that helps you track conversions from Facebook ads, optimize ads, build targeted audiences for future ads, and remarket to people who have already taken some kind of action on your website. This is something that you need to install immediately, if you haven’t done so already.
Moving forward to your campaign audience, the screen should look like this:
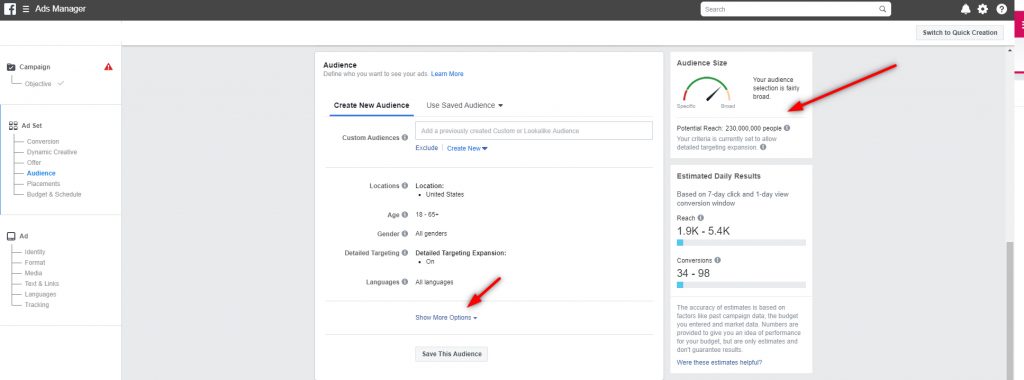
As you build your Facebook audience, the platform will show you your estimated daily reach, and tell you if they think your audience is too big or small.
You can target likes, interests, behaviours, demographics and more on Facebook. If you wanted to, you could make your audience super-specific.
Setting up the right Facebook target audience is vital to the success of your campaign.
4. Setting Up Your Ad Placement on Facebook
As a default, Facebook will have “automatic placements” selected. This method is usually optimised to give you the best results.
However, you can set up custom placements if you have the data on what placement works best for you.
On Facebook itself, you have the following options for placement:
- Facebook feed
- In-stream videos
- Marketplace
- Facebook stories
- Right column
When it comes to placing your ads, Facebook usually does an excellent job with auto-optimisation.
That said, cost-per-results can differ depending on the placement you’re using. That’s why split-testing your campaign and ad placement is vital – you need to find where the audience are seeing (and reacting to) your ads.
If you’re setting up your first Facebook advertising campaign, we highly recommend that you use Facebook’s Automatic Placements.
Setting Up Your Facebook Ads
Remember, the ads themselves are what your audience are going to see, so they need to look good. You can select your preferred Facebook ad type, and insert your ad images and copy.
There are a huge range of Facebook ad types to choose from. In this post, I won’t go over all of them, but will select a few I think will best suit your needs.
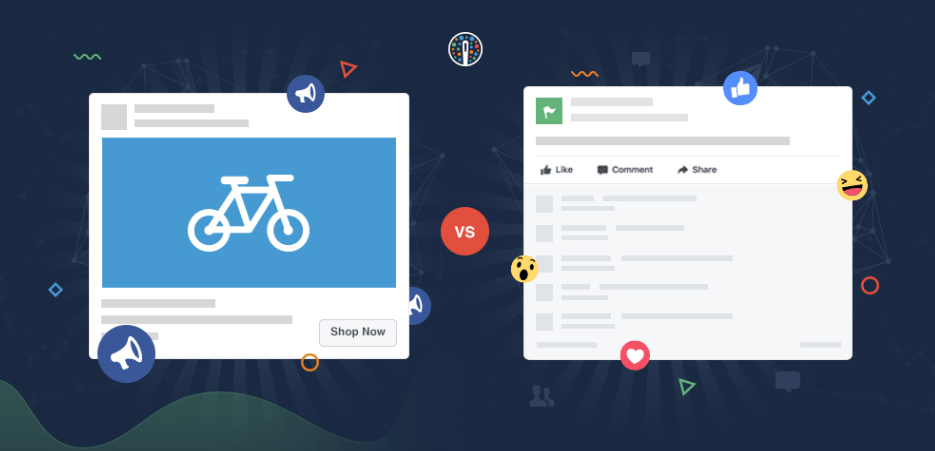
1. Link Click/Single Image Ads
These are your “typical” Facebook ads.
Single image ads help get your audience from A – B (i.e. off Facebook and on to your quiz or advertorial). You can use this ad types with several placements, which allows you to reach a large audience.
This ad type generally performs really well, and can also generate Likes for your fan page (if you have one). Remember to reply to any comments to keep the engagement up!
Recommended image size comes to 1,200 x 628 pixels. For the headline, keep to under 25 characters if you can.
The creative length can vary wildly. Some say that ad copy is best at under 90 characters. However, Flexx Digital has had enormous success with ads over 1000 words in length (depending on the product or service).
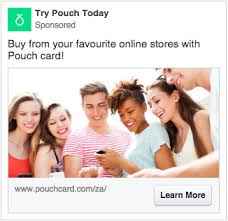
2. Video Ads
Video ads are very similar to Single Image ads – instead of an image, you have a video.
Some argue that any agency not using video ads in their campaigns are leaving money on the table.
Obviously, video ads take more planning and preparation than image ads. We’ve provided tips on YouTube video ad creative later on in this post. You can apply this same advice to your Facebook videos.
Facebook video ads allow for “continuous looping”, meaning that the video plays again automatically once it’s finished.
Videos can be up to 120 minutes, but best performing ads are usually between 15 seconds to 3 minutes.

3. Carousel Ads
Carousel ads allow you to show up to 10 images, videos or calls to action in a single ad unit.
These ads are extremely useful for those wanting to display a range of visually appealing products (eCommerce advertisers).
However, with niches like yours and mine (finance, insurance, etc.), it can be difficult to use this ad type effectively.
4. Collection Ads
A Facebook collection ad consists of either a cover image (main image) or video, with four smaller images underneath.
The user can click onto any part of the ad, and they’ll be directed to a full-page version of the image they selected. This will help boost engagement, and get them really excited about the product or service you’re offering.
Like carousel ads, collection ads can be difficult to use in certain niches. However, you CAN use collection ads in these niches if you use your imagination.
You COULD use the image opportunities in a collection ad to make a clickable quiz.
Use those four images to ask your users a question. For example, if you’re writing ads for a debt consolidation service, you could write something like this:
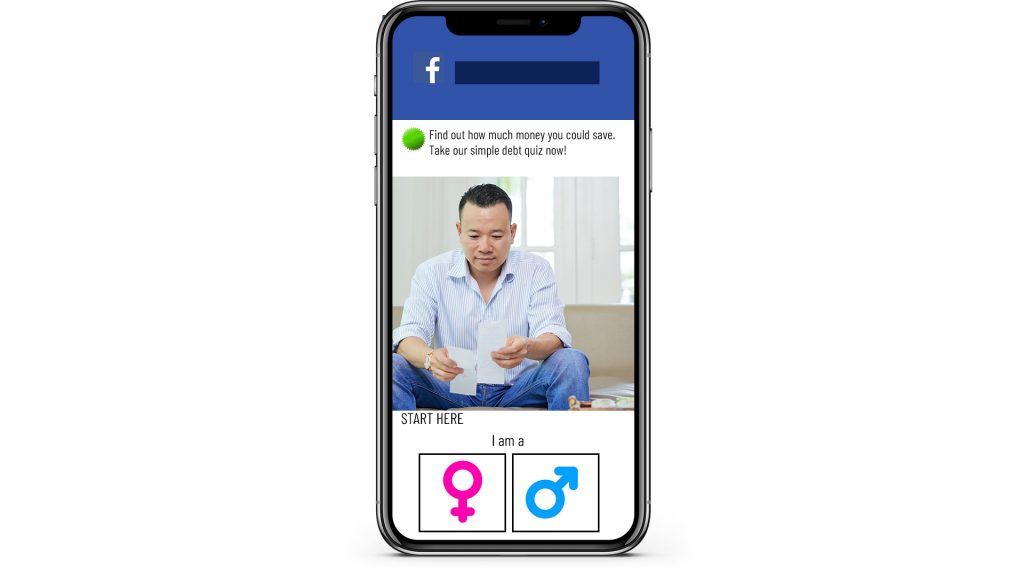
Obviously, yours will look a lot, lot better than this, but it’s just a quick example.
Though the question won’t set any hearts or minds on fire, you’ll be amazed by how many people make that click.
See, it’s almost an impulse. Have you ever wanted to mess with a light switch, even though you know it’s definitely only a light switch? These quizzes work precisely the same way.
Next thing you know, the user’s made the next click, and they’ve hit your advertorial (the middle of your sales funnel).
Because these mini-quizzes don’t look like advertising, our conversion rate is much higher.
Facebook offers a very broad range of ad types that meet every need of your business. This is just a small selection.
Whenever possible, we suggest that you test different ad formats to see which ones perform better for you. This will deliver the best results at the lowest cost.
Now that you have an idea of what ad formats you can use on Facebook, let’s move over to the ad creative.
Facebook Ad Creative: How To Get The Most Out Of Your Ads
Facebook recommends that you update your creative every two weeks to avoid ad fatigue.
Facebook isn’t a “set it up and leave it” platform. If you’re advertising for local businesses (dentists, doctors, gyms), then you’ll find yourself with a small audience of about 40,000-500,000 people. Facebook can show your ads to all these users relatively quickly, whereas a national audience (in the millions) can stand a much longer advertising period.
But an ad’s short shelf life shouldn’t be considered a burden. An agency’s work can only improve through practice, practice and more practice.
If you take the time creating customer avatars, looking into Audience Insights and developing great hooks, your agency will soon reap the rewards.
There are several elements that make up the “ad creative”:
- Your marketing hook
- Your headline
- Your ad copy
Here are some top tips on how to hone your Facebook creative for maximum campaign results.
1. Your Marketing Hook
A marketing hook is often a sentence that describes and sums up an offer’s biggest benefit.
It’s a curiosity-driven idea that should run throughout your entire marketing campaign.
An attention-grabbing hook is hard to write so you may find yourself writing 5, 10 or 20 before you’re happy with one.
When I’m trying to come up with a sales hook, I keep these three things in mind:
- Inevitability
- Intrigue
- Promise/Solution
Sound like a lot to fit into a sentence or so? Here’s a good example:
In February 2018, DashThis, an agency reporting software company, asked Facebook: “What’s the difference between DashThis and a regular old spreadsheet?”
Although DashThis’ service isn’t one you’d call “exciting”, they managed to take something mega boring (a spreadsheet) and suggested that their product somehow kicks a spreadsheet’s ass.
In the space of a question, DashThis tapped into three selling points:
- Inevitability: Spreadsheets are a part of life
- Intrigue: Our automated spreadsheets are different – find out why!
- Promise/Solution: By being different, our product is better. This could be the solution to your “boring spreadsheet” problem.
There’s so much subtext you can stuff into one sentence. It doesn’t need to be in the form of a question.
Last year, PPC Manager, Graham Connolly, wrote the following hook for a debt service: “How mums are writing 75% off their debt”.
After clearly defining his audience (mums), he tapped into the same three selling points:
- Inevitability: People get into debt and have to pay it back
- Intrigue: How did these mums get so much debt written off?
- Promise/Solution: Read the article, and you can do the same
In just a few words, you’ve caught the reader’s attention enough to make that click into your sales funnel.
2. Write an Attention-Grabbing Headline

Stat for you: 70% of people only read a headline before sharing and reacting to the content.
Have you ever seen a Vice article on Facebook? Most people only read the headline before they’re jabbing furiously at their mobile phones, desperate to put in their twopence worth on the world wide web.
At this point, Vice would be able to run perfectly well without any content. They could sack 90% of their creative staff, and have someone patiently tapping out headline after headline instead.
And why have Vice gained such fame/notoriety? Because they know exactly how to push their target audience’s buttons.
Recent headlines include:
It’s Weird and Gross to Marry Someone Decades Younger Than You Are
A Few Warning Signs That Astrology Apps Might Be Ruining Your Life
What It’s Like To Have An Extreme Fear of Chewing Sounds
An Assassination Job Got Passed Along by 5 Different Hitmen. Now All Are In Jail.
From genuine interest stories to absolute drivel, you can see how these headlines cause anything between 100% agreement to brain-melting fury.
And you need to create something similar headlines with your online ads. You must force people to be able to do nothing but click.
You’ve got about 3 seconds to make an impact, and AdEspresso says that the optimal number of words in a Facebook headline is 5.
It may sound easy, but writing a relevant, clickable headline is surprisingly frustrating. You may find you need to draft 10, 15 or 20 before you come up with a winner.
Here are a couple of pointers to help you out:
- Be clear and precise. If your headline could represent anything, then it’s not a good headline. Sparking curiosity isn’t the same as being infuriatingly vague.
- Use superlatives. So, general consensus says that people are fed up with words like “awesome” and “amazing”, and yet they continue to work. It seems that people can’t resist anything new or shiny, or what promises to be a quick-fix. It must be ingrained into us.
- Action words, too. No, not “buy”. Action words like “get”, “try” or “learn” taps into people’s curiosity and promises to lead to some sort of solution. “Buy”, on the other hand, suggests the solution is tied in with a transaction. That’s like throwing cold water onto sun-warmed skin.
Be negative. No, I’m not deliberately contradicting myself. If you’ve called something “amazing” so many times it’s gone rotten, try the opposite.
See, people like to read things that tap into the four S’s:
- Shock
- Shame
- Surprise
- Strong emotional response
The ad world can be glutted with superlatives, making some sales-pitches (aka, not those related to the glamorous stuff like shoes, food and clothes) sound fake and sickly-sweet.
Everything is sold as “astonishing” or “groundbreaking” or “fabulous” and, most of the time, the product/service turns out to be “meh” at best.
Here are some examples of good “negative” headlines:
7 Reasons Your Ads Are Destined To Fail (confrontational)
One Small Mistake Means This Mum Is $200,000 In Debt (scare tactics)
How Lindsay Lohan Destroyed Her Looks (makes people feel paranoid)
These headlines work because they’re A) nice and short, and B) freak people out enough that it’s impossible to remain impassive.
Remember – Avoiding pain is more important to our survival than gaining pleasure.
If all else fails when it comes to writing an awesome headline, try using a formula like this one:
[DO THIS THING] + [IN THIS AMOUNT OF TIME] + [GET WHAT YOU WANT]
For example:
[Have a phone call with me] + [For 45 minutes] + [And you’ll be able to skyrocket your business to 10x what it was before].
[Use this detergent] + [For 2 washes] + [And your clothes will be better than new]
[Take this quiz] + [That lasts for 30 seconds] + [And see if you can take 75% off your debts]
Or you can go wild and swap things around.
[GET WHAT YOU WANT] + [TAKE THIS ACTION] + [IN THIS AMOUNT OF TIME]
[Make the best gooey chocolate fudge cake] + [with just four ingredients] + [in 45 minutes]
[Save hundreds on car insurance] + [with a personalised consultation] + [by the end of the day]
[Make amazing YouTube ads] + [with only a mobile phone camera] + [in less than half a day].
3. Use Power Words In Your Ad Copy
This is a hack for you copywriters!
No one wants to read page after page of yawn-worthy writing.
Most copywriters try to use a conversational tone. Even professional B2B buyers will avoid purchasing anything if emotion doesn’t come into play.
That said, used occasionally, official-sounding language can make an emotional impact.
Audiences love labels and anything that sounds like a fact. For example, using labels such as “government-backed” adds credibility to your service and makes the audience want to trust you (ideal!).
These are called power words, and these are the words that sell.
Here’s a quick example. Consider these sentences:
“Get what you need.”
And
“Get what you’re entitled to.”
Both mean the same thing, but the second makes you sound important while the other makes you look needy.
Tell the customer they’re entitled to or they deserve something, and you’ll stir up feelings like righteous ownership and empowerment.
There are plenty of “power word” examples out there. This one is my favourite source: CopyWriteMatters.
Writing Facebook ads and setting up a campaign can seem a daunting task if you haven’t done so before. However, the results for lead generation are truly worth it.
I don’t want to just concentrate on Facebook in this post, however, so let’s move swiftly on to Twitter Paid Ads and how to set up your first Twitter campaign.
Step 7: Setting Up Your First Twitter Ad Campaign
Word of warning: it takes about two weeks to get approved for a Twitter ad account.
Luckily, creating an account (waiting time aside) isn’t too strenuous.
Firstly, you will need to create a Twitter account at www.twitter.com. Ensure the account handle is your advertorial brand or lead gen brand or an avatar.
You will then want to go to ads.twitter.com.
But, remember, for the first 2 weeks, your account will be ineligible to create ads etc, to ensure you are a real user.
You should start to build out your profile –
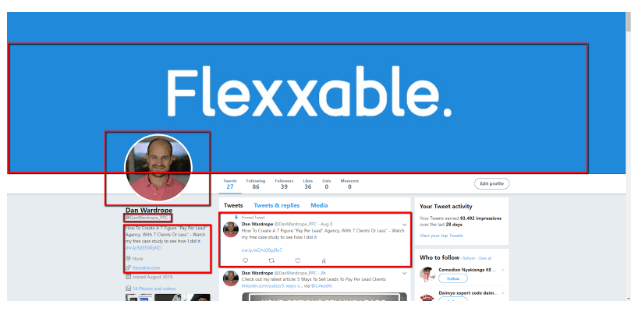
You want to ensure the following is complete –
1. Cover photo
2. Profile picture
3. Your handle (@yourhandle)
4. Your bio (ensure you put a small ad in here with the link to your lead gen page for any organic traffic that comes to your page from the ads. Try and make sure its a tracking link so you know it’s organic). Also, add your location etc. You want your page to look authentic.
5. Add a tweet (same add with the link to your lead gen page. Try and make sure its a tracking link so you know it’s organic). Ensure you pin it to the top of your page.
6. You can start tweeting industry-specific links for informative reasons to make your page look active and to show Twitter you are showing good content. It all helps your overall account get a better “Twitter score”.
After you’ve waited for 1-2 weeks keep checking to see if you can get a Twitter ad account. To check, go to ads.twitter.com and this screen should appear –
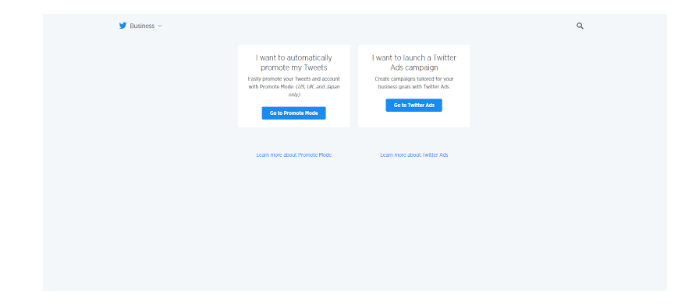
Click “Go to Twitter Ads”. If you are now eligible for a Twitter ad account this screen should appear –
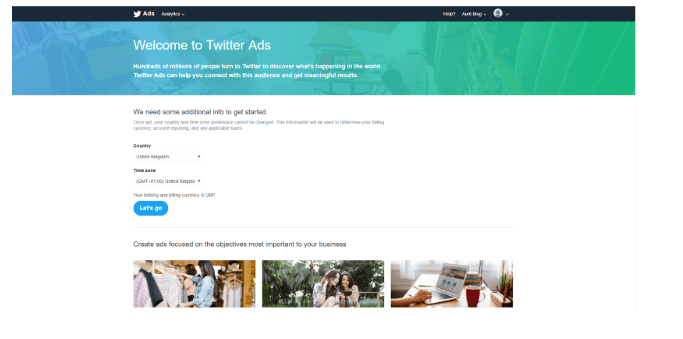
Got it? Then you can crack on. If not, you may have to wait a little while longer. Select the correct details and press “let’s go”!
It will then take you to this screen –
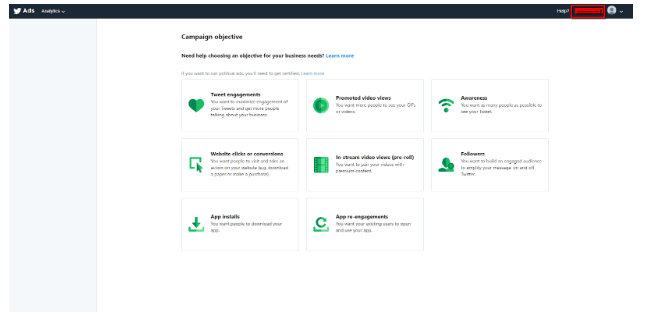
DON’T start creating the campaign just yet. Instead, click your account name in the top right-hand corner as shown in the picture.
On the drop-down click “Add new payment method”. Then fill in your credit card details etc.
Once this is done you will be able to create your Twitter cards and tweets.
2. Twitter Creatives
Creatives on Twitter are compiled in two parts. You have the card which houses the link, photo and headline. Then there’s the tweet itself, which is added to the card and is the main ad copy.
Twitter Cards
You firstly want to click on the “Creatives” tab and select “Cards”. It will open this screen –
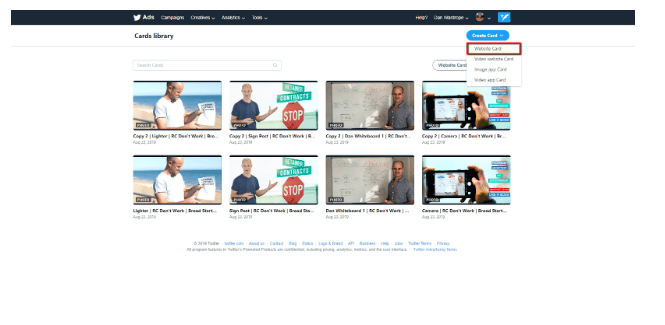
1. Picture – This should be similar to the ones that have previously worked on your Facebook campaigns. Red images or native looking images will usually work best.
2. Headline – This should be short and snappy. It should generate some intrigue, so they are wanting to know more (Then the advertorial can sell them on your product/service). Good examples are “Most UK Citizens didn’t know…..” OR “UK Seniors Are Claiming Back Thousands….”
3. Website URL – It’s important that you have a way to track your leads. Again, be warned. Twitter isn’t the best at tracking conversions, so use Google Analytics to track your goals, UTM parameters, etc.
4. Card Name – Name your card so you will easily know which is which. This is because when you scale you will need a lot more.
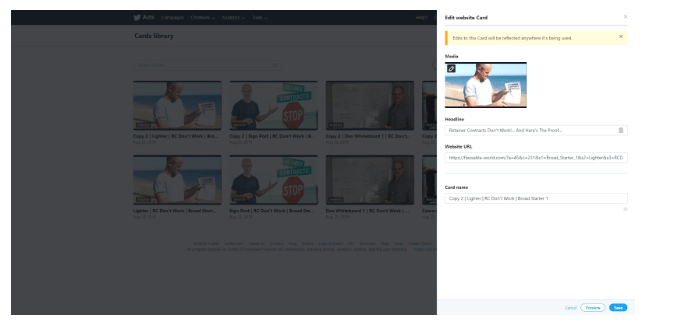
I recommend creating 3 Twitter cards for your first run. Keep the same headline, but change the picture for each. Don’t forget to change your tracking link for each card.
Twitter images come in the following sizes:
800 x 418 pixels for 1.91:1 aspect ratio, 800 x 800 pixels for 1:1 aspect ratio (max 3mb)
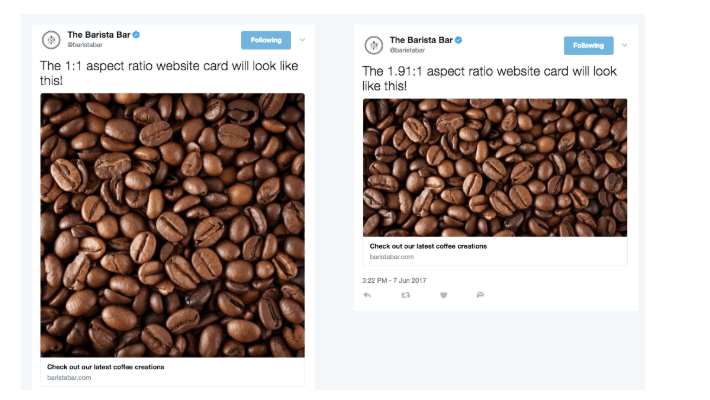
Tweets
Now the cards are done, it’s time to create some tweets!
Go to the “Creatives” tab and select “Tweets” in the drop-down menu.
Click “New Tweet” in the top, right-hand corner.

Then do the following:
1. Place your ad copy in the composer box.
2. Add a Twitter card using the appropriate button (as shown in the image below)
3. Check the box marked “Promotion Only” so the ad isn’t Tweeted to your profile page.
4. Repeat with the other two cards.

3. Conversion Tracking
I’m not here to spread false promises – conversion tracking on Twitter is pretty terrible.
Still, there are ways around it.
It’s also important to have some idea on which ads are performing the best for you.

Click on “Tools” in the menu and select “Conversion Tracking”. Select the checkbox and click “Generate Website Tag” for “Conversion Tracking”.
Once you have your script, head on over to Google Tag Manager.
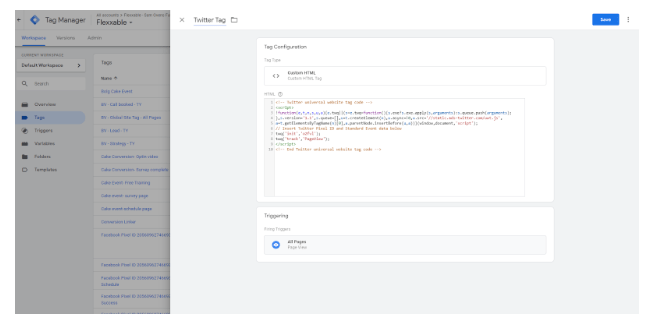
Add a new tag called “Twitter Tag” and select “Custom HTML”. Copy and paste the script into the box and ad set the trigger to all pages. Save and submit the changes.
Once you’ve done that, come back to your Twitter screen. Click “Return to Conversion Tracking”.
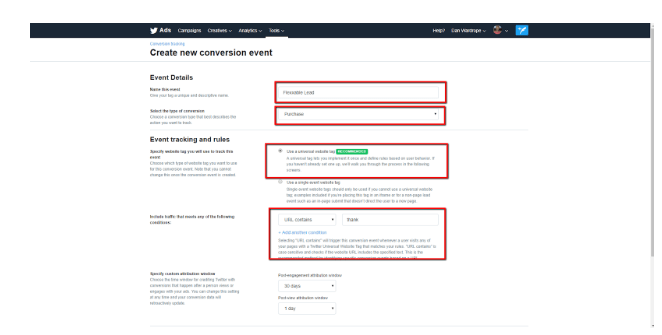
Now, fill out your requirements for conversion.
Name it, select the type of lead ( “Purchase” would be my go-to), use the recommended universal tag and add the “URL Contains” rule.
Save your conversion event.
Then return to conversion tracking. It will say the conversion is “Unverified”. Go to your site and specifically to the page you have attributed the conversion event.
You then want to check if the conversion is verified. It will take a while, but periodically check that it has registered your page view.
Building Your Twitter Campaign
Now for the exciting bit: setting up your campaign.
It should look a little like this once you’re finished:
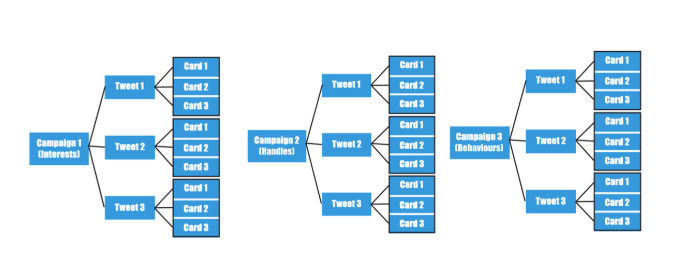
Select “Website Clicks” or “Conversions” as the campaign objective.
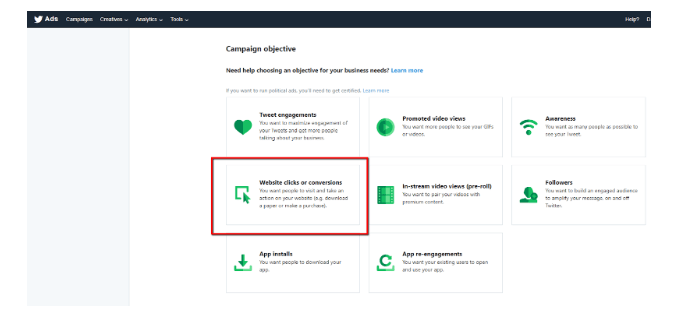
Once you’ve done that, it’s time to set the budget.
1. Budget
Twitter can be slow to start the spend, so multiply your daily budget by 10. For example, if you want to spend $50 – $100 a day, set the daily budget to $500.
Top tip: Twitter loves larger budgets.
But be careful. Sometimes Twitter can get a bit spend-happy, so keep an eye out for any escalation.
In truth, you can have huge budgets but Twitter will rarely spend them.
For example, Flexx Digital can have a $10,000 daily budget, but Twitter will spend less than $500.
You’ll have to keep a closer eye on Twitter than other advertising platforms, but the rewards can be huge.
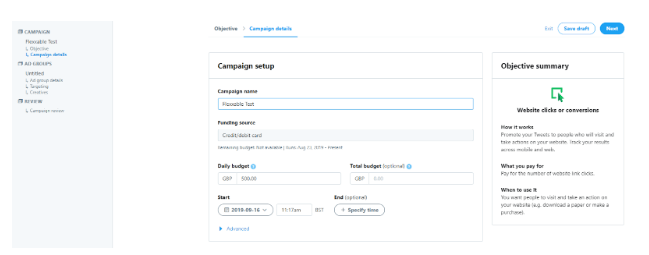
Input your campaign name, select “Credit Card” as your funding source and add your daily budget.
You don’t even need to touch the advanced settings.
Next, create your ad set. Input any name (you can always change it), then set “Bid Type” to “Maximum”.
Put in a bid of about $0.20 for website clicks. This may be a little low, but it’s far better to start low and increase, rather than the other way around.
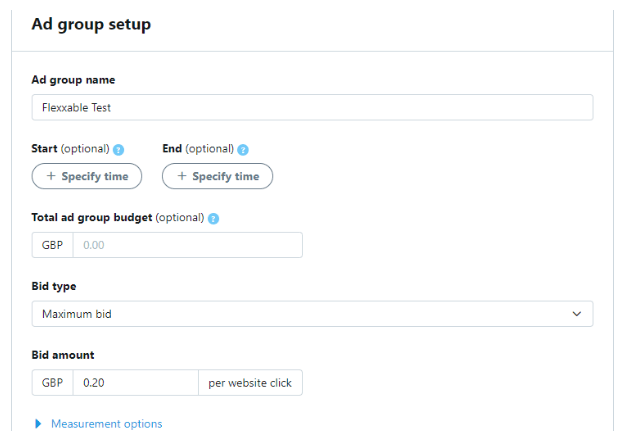
Let’s move onto targeting.
Twitter can be AMAZING for targeting, as you can search for any relevant handles. You can also hone in on extensive interests and behaviours.
But a word to the wise – age targeting is pretty bad. It’s not a catastrophe, but just keep it in mind.
2. Demographics
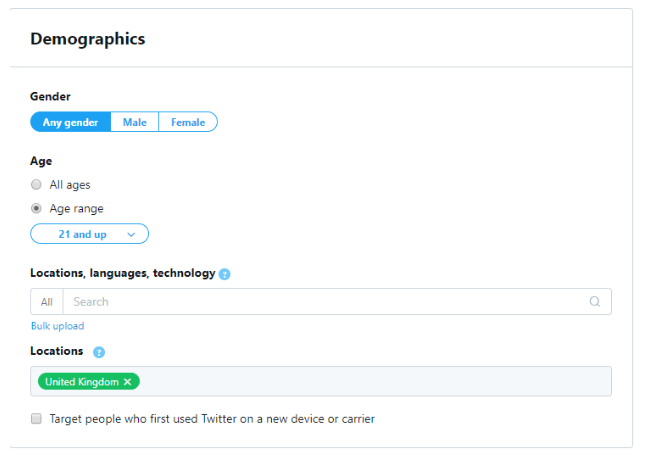
There are the usual options of gender, age and locations. Don’t expect anything as powerful as Facebook, but demographic targeting is still worth using.
You’ll note that age is made up of pre-populated age-ranges.
Then select your location. When you first start out, you can’t exclude any areas. However, once you’ve spent money on Twitter for a while, a Twitter rep can unlock a lot of features on your account.
3. Audience Targeting
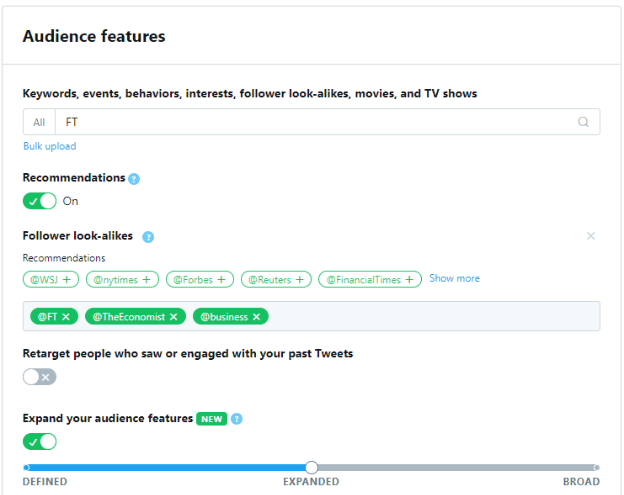
Audience features allow you to target handles, interests and behaviours.
Handle targeting lets you to target people with similar interests to an account’s followers.
For example, say you were advertising services for debt consolidation. Martin Lewis from moneysavingexpert.com has a vast Twitter following when it comes to money-saving tips. With Twitter’s “follower look-alikes targeting”, you can target people who follow him and people who are similar to his followers.
If you’re running a money-saving offer, whitepaper or service, that kind of targeting can be incredibly powerful.
Here are Twitter’s Pro Tips when it comes to handle targeting:
1. Aim to target around 30 usernames per campaign to ensure that you’re reaching a broad enough audience.
2. Target the usernames that are most closely tied to your business. While very famous individuals or companies may have millions of followers, those millions are not necessarily aligned around a topic that’s relevant to your business.
3. Focus on segmentation. Segmenting campaigns helps you to identify what’s working best. Get better results by monitoring your campaign dashboard closely. For instance:
- When targeting usernames, we recommend that you do not add interest targeting into the same campaigns. Instead, you can run a separate campaign with broad interest targeting.
- Segment your username campaigns by category (for example, try running one campaign targeted to the usernames of your competitors, and another targeted to the usernames of industry media).
With the interests and behaviours, if you are targeting the UK then don’t use ones that say “US only”. This will obviously not work for you.
“Conversations” can also be incredibly powerful. If there’s a current news story trending on Twitter (and your service is associated with it, of course), you can leverage this conversation to get leads
4. Placements & Creatives
It’s time to select the Tweets you composed earlier.
Make sure you select “Promoted Only Tweets” in the drop-down menu.
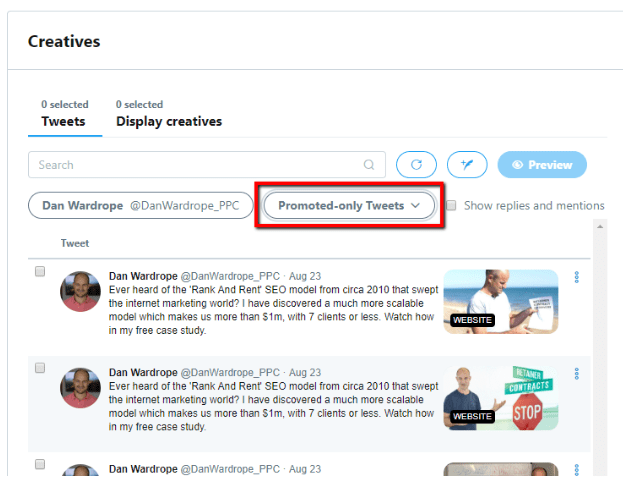
Check all the Tweets you’ve created, and ensure you have the correct placements for your ad.
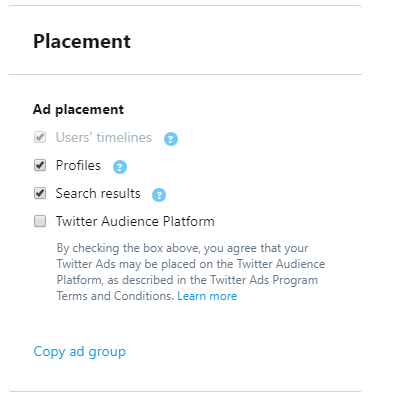
UNCHECK the “Twitter Audience Platform” feature as this can be a huge waste of money. However, leave “Search Results” and “Profiles” checked.
Finally, check over your campaign overview.
Congratulations! It’s time to launch your first Twitter campaign.
Step 8: How To Master YouTube Advertising
YouTube is the second biggest search engine on the planet – so it can’t be missed when you’re running ads for your clients.
Here are a few quick stats about the platform:
- YouTube is actually classified as a search engine, and its popularity is second only to Google.
- It has 1.5 billion active users
- Users make about 3 billion searches per month (that’s more than Bing, Yahoo, AOL and Ask.com combined!)
- 300 hours of video are uploaded to YouTube every minute
- YouTube streams 1 billion hours of video to users every day.
If stats like that don’t get you excited, you’re probably in the wrong business.
But I do get it. YouTube advertising can seem daunting, especially since it 100% relies on video.
Here’s my #1 suggestion (not a tip!): just give it a go.
Video is processed by the brain much quicker than written text, and it allows businesses to form a closer human connection with their customer. This elevates trust between customer and brand, leading to more leads and more sales.
What YouTube Ad Style Should I Opt For?
You’ve got three key types of YouTube ad:
- Preroll
- TrueView
- Bumpers
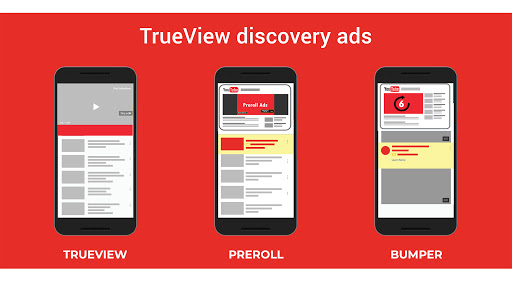
Preroll
Preroll YouTube ads are non-skippable ads that make people watch them until the bitter, bitter end. They can turn up before, after or halfway through the visitor’s chosen video.
As of January 2018, preroll YouTube ads have a time limit of 15-20 seconds.
Preroll ads have their pros and cons, like all forms of advertising. On the one hand, these ads get the best engagement rate of all YouTube ad forms (mainly because the viewer has no choice).
On the other hand, there’s also a higher video abandonment rate.
If you choose to use preroll ads, make sure your story is TIGHT. 20 seconds is long enough to have characters, dialogue, and build brand awareness. Make sure you include a call to action and give your viewers something to click.
Bear in mind that YouTube’s preroll videos are charged on a PPC (pay per click) basis. A crappy landing page beyond the YouTube ad could waste a hell of a lot of money.
Bumpers
Bumper YouTube ads are the shortest of all the ad styles. At a mere 6 seconds long, they’re non-skippable and play before the viewer’s chosen video.
If you want to use bumper videos, I highly recommend you use them as part of a larger video campaign. With the correct targeting, your audience will hopefully see a mixture of your TrueView, preroll and bumper ads.
Bumper ads are all about brand-awareness. Get your logo up there, and make sure you’ve got one hell of a tagline.
TrueView
TrueView ads are the standard on YouTube, and the type we use at Flexxable and Flexx Digital.
YouTube doesn’t have a strict time-restriction for TrueView ads, so they can last between 12 seconds and 6 minutes in length.
That said, viewers have the option to skip a TrueView ad after 5 seconds. So, if you want to get their attention, do it quickly.
However, the great thing about TrueView is that you only pay when viewers watch or interact with the ad. For example, if a viewer chooses not to skip after 5 seconds, but skips after 10, you won’t pay anything.
YouTube only counts the ad as “watched” after a full 30 seconds or until the advertisement reaches the end. You’ll also pay if the viewer interacts with your ad, such as clicking on a link. Again, make sure that click is worth it for the user.
In my opinion, TrueView ads are the way forward and an essential feather for any serious lead generator’s cap.
And YouTube ads don’t have to be needlessly complicated. Next, we’re going to look at writing a YouTube script.
Your YouTube Ad Script
Here’s a quick run-down on how to piece together your YouTube script. Having a great script is the no.1 way to cut your cost per lead on YouTube.

Section 1 – Your Hook.
You need to call out your audience from the very beginning. This could be something as simple as asking a rhetorical question: “Are you a [man/woman/dad/mum] who’s tired of [being in debt/expensive car insurance/waiting decades to pay off your mortgage]?”
Using “tired of” or “fed up of” feeds directly into the emotional mindset of your audience. If they’re not “fed up” then that ad’s not for them. No biggie!
Section 2 – Build Emotion.
Talk about the audience’s critical problem – and make sure it’s only one. If you try and take on too much in one vid, you risk confusing your audience.
Shoot straight to the heart of the matter: “The biggest problem a lot of [men/women/mums/dads/etc.] face is [insert their critical issue]. Expanding on their problem also provides context for the viewer.
Section 3 – Why Am I A Credible Speaker?
What gives you the right to speak on the topic?
Have you been through the same problem yourself? Are you an “expert” in the field?
If you choose the “expert” route, please make sure you either are or hire an actual expert. Audiences don’t appreciate being lied to, and a quick Google search will uncover your credibility (or not).
You can also drop your brand name at this point. I.e. “[YOUR BRAND] has helped thousands of [women/men/dads/mums] out of [KEY PROBLEM].
Section 4 – Solution.
How can [YOUR BRAND] help that person right now?
It’s important not to expect too much from your audience at this point. If your product/service costs a lot of money, a two-minute ad isn’t going to persuade them to take the plunge.
Start off small with a quiz, asking for their details, and promise them a free gift in return: “We created this [FREE TOOL] that will show you how to [INSERT DESIRE]”.
Section 5 – Call To Action.
It’s the end of your story, but it’s not the end of theirs. Ask your audience to “complete their story” by encouraging them to click the link/give their details/arrange a phone call. Make it sound like the solution to their biggest problem is within arm’s reach. Remind them that, if they’re still watching your video, they need your solution. Your viewer needs to feel a strong sense of investment.
Once You’ve Got Your YouTube Ad Script
1. Hire Actors Directly – There’s No Need For Agencies
2. Be 100% Clear And Honest About The Role Description
3. Local Acting Groups on Facebook
4. Use Fiverr
The creative isn’t just down to a rockin’ good script.
For every video, we hire at least two to three actors that will appeal to our audiences.
We ask every actor to read from the same script, then we edit it into our YouTube ad. It all comes down to split-testing.
The results may surprise you. For one of our YouTube ads, we were sure that a white woman in her mid-forties would be the most popular with our audience. However, the ad that worked best was a black woman in her late-thirties.
Here are my top tips on hiring actors.
Hire Actors Directly – There’s No Need For Agencies
Unless you’re trying to work with acclaimed talent, there isn’t much need for you to approach talent agents. There are several ways you can find actors without running casting sessions or working with agencies.
Be 100% Clear and Honest About the Role Description.
We work in a few industries, including the financial services sector. This can mean we make adverts about delicate subjects, such as offering debt services. Some people may feel uncomfortable filming this kind of content, so you need to make the topic clear from the outset.
Local Acting Groups On Facebook
Facebook has hundreds of local and national actor groups. Likewise, you will find filmmaker groups populated with fresh talent as well as seasoned pros.
Facebook is an excellent place to find local talent, cheap studios and production companies to work with.
Use Fiverr
Fiverr is an excellent place to find actors without breaking the bank.
You can post a job on the site, and it’ll be up to the actor to provide the lighting, microphone, backdrop, and all the difficult stuff.
And, 9 times out of 10, the entire project won’t cost you anything more than $20-$50.
Targeting Your YouTube Ads
You can cut your cost per lead on YouTube by correctly defining your audience targeting.
AdWords has a tonne of audience targeting methods to use on YouTube. You’ve got:
Demographic groups: You can choose the age, gender and household income of your audience.
Detailed demographics: These are additional traits you can choose from, including whether or not your audience consists of students, homeowners, or new parents.
Interests: This gives you the power to advertise to people who’re interested in specific issues, even when they’re visiting pages about other topics.
Affinity audiences: YouTube gives you the option to target people who already have a keen interest in your ad’s key topic.
Custom affinity audiences: Ever made a custom audience on Facebook? This targeting method allows you to get much more granular with your targeting. For example, if you’re advertising car finance, you could reach business owners looking to lease a company car.
Life events: Want to target audiences that have just got married? Or people who’re heading towards retirement? Life events targeting will let you do that.
In-market audiences: Want to target people who are actively searching for products or services that are just like yours? You may want to look at your in-market audiences.
Custom intent audiences: This is where viewers begin to question “can advertisers read my mind?”. Custom intent audiences allow you to advertise to people who’ve recently searched for similar keywords on Google.com.
Topics: This method will allow you to target audiences interested in specific topics. For example, if you target “Writing and Editing Services”, your ad will show on YouTube to people looking up videos about copywriting.
Devices: You can target users based on their use of devices, such as smartphones, laptops, and Chromecast.
How granular you want to get with your targeting depends on how much you’re willing to pay for that click. If you’re advertising to a vast audience, you may see your YouTube cost per lead spike before the Google algorithm sorts itself.
If you’re targeting a hyper-granulated audience, be aware that your cost per lead may spike over time, as Google searches for audiences that suit your targeting.
Custom Affinity and Custom Intent audiences are very powerful, here. Much better than Facebook. We can target roofing websites, competitors, people who are searching for roofing etc.
This is what a custom intent audience looks like:
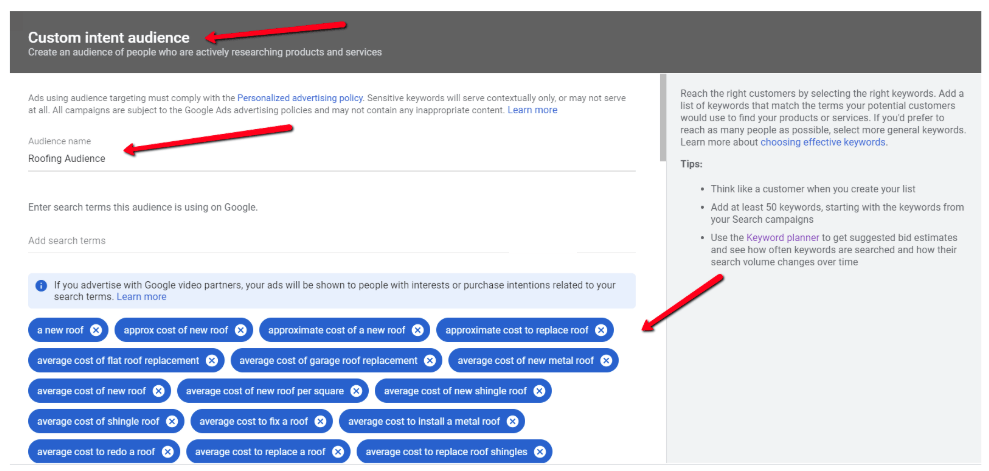
The lead cost may be a touch higher, but the quality is going to be better. People will be educated and informed by your YouTube video before clicking over to the website and the rest of your sales funnel.
Once you’ve got your YouTube ad up and running, simply link it to your quiz – the same way you would an ad to advertorial to quiz funnel. Because the audience have been educated by the video, I guarantee engagement will be off the charts.

Step 9: How To Optimise Your Funnels And Partnerships
We’ve found that the key to building the perfect campaign is split-testing. Flexx Digital drives millions of clicks per year, and we regularly split test our pages.
If you’re not split-testing, you’re definitely leaving money on the table.
If you or your designer has spent days perfecting your funnel, copy and imagery, the harsh reality is that if your target audience doesn’t relate, you’re likely going to generate leads at a high price
See, the only way you’ll find out how well your lead campaigns are working is via audience engagement.
Spent ages on a page and love the way it looks? The harsh reality is that if your target audience hates it, you’re not going to generate any leads.
It doesn’t mean that your writing is terrible, or the image quality is poor. It just means that the page doesn’t appeal to the specific group of people you’re trying to target.
So, a split-test is a way of testing multiple versions of your ad/advertorial/marketing quiz/ landing page against one another to see which version works best.
Sometimes, your variations can test significant elements, such as layout, writing style and page design.
Other times, it may be as simple as changing one word in a headline or a specific image.
It really doesn’t take much for an audience to turn against you!
You need to approach split-testing the same way you would a science experiment. All split tests start with a control – aka the original version of whatever part of the sales funnel you’re testing.
To make it a split test, you’ll also need a variant. You can have one of these, or two, or three. As long as an equal portion of your traffic is sent to the control and its variants, you’ll have a clear indication of which comes out top.
When it comes to creating your variants, don’t change something just for the sake of change. Your market research should tell you what kind of writing style, images, copy and design your target audience will respond to. A split test will help you get all the details right, maximising the lead conversions for your campaign.
At the end of your split testing, you should:
- Have got rid of any guesswork in your marketing campaign
- Be able to create better content
- Know how customers honestly respond to the presentation of your offer
- Have maximised your web traffic
- Yield a higher ROI than before
If you fail to split test your landing pages, thank you pages, etc., you’ll experience a high drop-off rate. Most ad platforms (such as Facebook, YouTube, etc.) will pick up on this and penalise you. This can cause your cost per lead to spike.
Changing your ad creative will only get you so far. If you’ve got a brilliant ad, but your landing page (for example) still sucks, you’ll find yourself repeating the same pattern again and again.
Split-testing can be a slow process (some pages you can split-test hundreds of times), but the results are worth it. No matter how good you think an element of your funnel is, it can always be better.
Call Centre Partnerships or the “Package Model”
I’ve talked about in other articles the three main methods to charge for leads.
For those of you who follow my work, you’ll know that these are the hybrid, front-end, and back-end models.
If you need a refresher, then check out my video below where I explain these methods in detail.
Over the last six months or so, Flexx Digital has been working on a new method – the “Package model”.
This model is essentially a call-centre that sits between the lead and the client. So, rather than send the lead directly to the client, it’s sent to this “package call centre” instead.
The call centre then works the lead and makes it “red hot” (super interested). Once the prospect has nibbled the bait, the call centre then sells it onto the client for 5-20x what the lead cost to produce.
You can also do something called “hot keying”. This is when the call centre works the lead until a certain point. When the lead has reached that point, the call centre transfers the live call over to the client to close.
Prices for leads can differ depending on the industry and the quality.
Essentially, if you choose the package model, you can have more of a hands-on approach in the entire sales process. For example, you could introduce your client to technology such as 2-way SMS, Bonjoro, Active Campaign, and so on.
You’ll find that clients will be so happy to have someone innovate their sales process with tech, they’ll pay the extra price with few complaints.
Remember that anything they spend on your services, they’ll make back tenfold, so all your tech and sales skills are an excellent investment.
Here are the positives and negatives of pitching the package model to your client:
Positives:
- You’ll get paid more
- There will be more buyers
- It’ll add another string to your agency’s bow
- You’ll figure out the quality of your leads quickly
- Having a call centre will force you to be really good at what you do
- Market leaders will (eventually) buy your business
- Big clients may fund your costs
- You can use one call centre for multiple, related, verticals
- You can team up with other call centres to minimise your risk
- Hiring staff is usually fairly inexpensive
Negatives:
- Most of the time, your own money will be at stake
- More people to manage – and human nature means some bad days
- Can be expensive to run depending on the software you’re using
- Will take a while to “settle in” and hit your stride
- Will also take time to understand your vertical to a “package model level”
- Not really an option when you’re just starting out
However, if you know what you’re doing and have a good understanding of your vertical, the package model can be insanely profitable.
If you can’t afford it now, it’s definitely something to set your sights on in the future. I think the package model could be an achievable growth and scaling point for Pay Per Lead agencies across the globe.

Step 10: Growing Your Agency By Hiring Staff
When you’re deep into running your Pay Per Lead agency, you’ll notice you’re hitting certain milestones.
As we’ve covered, finding the perfect niche or sub-niche with a nationally-appealing offer is Number One.
Landing your first big client is Number Two.
Then you want to be mastering building your funnels and also fine tuning your paid ad campaigns, alongside perhaps trying to build an organic presence through SEO. Not to mention onboarding more clients once you have everything dialled in.
Clearly this is an immense amount of work for one person.
You will want to consider hiring your first employee sooner rather than later. For me, this was a huge turning point when I could focus more on the stuff I loved (like sales and building relationships), and handed off the account management to my first hire
Eventually, you’ll get to the stage where you’ll consider hiring your first employee.
When you reach that point, congratulations!
It’s one of the first concrete steps to expanding and scaling your business.
As a general rule of thumb, you shouldn’t consider hiring staff until:
- You have at least 3 clients
- You’re earning roughly $5,000 + in revenue a week, with roughly 50% of that your profit.
When you’re well on your way to a 7+ figure agency, use these guidelines to hire new staff for your Pay Per Lead agency.
Top Reasons Why You Should Consider Hiring New Staff
1. You have about 3 clients, and you’re earning roughly $5,000 in revenue each week.
You’re off to the races! If you think that someone else could help you grow and scale your agency, now’s the time to do it.
You started your entrepreneurial journey for a reason. To escape the 9-5, your overbearing bosses, to make some real money. Now you’ve done the legwork, and you’ve got a solid business in place, it’s time to do some delegating.
Entrepreneurship doesn’t mean 30+ years of spending 70 hours at your desk (though it can feel that way at the beginning). And, as you get more clients who love your leads, the more that work pile is going to grow.
Get some help while the going’s good!
2. You’ve identified some new income streams.
Want more clients? To expand into another niche? To build another lead gen brand?
If you want to tap into a new market, but can’t, it’s time to get some help.
It won’t happen immediately, but hiring employees can actually increase your net profit. I know that sounds counter-intuitive, however, when you have someone to help time consuming agency tasks, it will allow you to focus more time on bringing in more revenue.
Meanwhile, having limited resources (sorry, but you are but one man), and no room to expand, means your profits will plateau.
Time to whack out a job description!

3. First, lets get bookkeeping and your finances outsourced.
If you can’t keep up with the bookkeeping, there’s a good reason for it. As your business grows, so does the paperwork. So, if you’re overwhelmed trying to keep accurate accounts, it means you’ve got plenty of clients to keep track of, and a good wodge of money in the bank.
Hire someone to help you ASAP, this is not a good use of your time. FlexxDigital (my agency) did this for years, and now we have the luxury of having an in house finance manager, you should aim for this as well, although a good bookkeeper and accountant outsourced is fine for most small businesses.
4. Next, look for someone who loves to do the stuff you hate
As much as we want to be, we can’t be good at everything.
At this point in your business career, you’re probably used to being a jack-of-all-trades. That said, there’s nothing wrong with bringing in someone better at specific tasks than you are.
Say, for example, that you’re a real people person. You love closing deals, talking to people on the phone, solving problems for clients, and building bulletproof relationships.
However, checking up on your ads, dayparting and tracking CPL makes you want to scream and scream.
You don’t have to do that anymore. Just because you hate it, doesn’t mean that millions of people out there don’t love it.
Hire someone and concentrate on doing what you do best.
5. You’re turning away clients
Of course, you shouldn’t promise a new client 100 leads a week if you don’t have the time to do it.
That said, turning down work looks bad.
Unless your reputation has reached word-of-mouth stage, chances are you spent some advertising budget reaching out to clients.
If they want to buy leads and you turn them down, you may never get the opportunity with them again. This is not good!
Worse, there may be existing clients who want to scale with you. Instead of 100 leads a week, they want 200, 400… even 1000.
If you can’t scale with them, they will reach out to your competitors.
I don’t need to tell you that retaining and building your business with existing clients is SO much cheaper than repeatedly acquiring new ones.
If you’re most, or all, of these points resonate with you, then here’s my guide to hiring that first member of staff. Eventually, you could end up with your “forever” marketing team!

Our Hiring Process
1. Write An Engaging Job Post
I see so many bad job posts on the net, I’m starting to wonder if employers are doing it on purpose.
I kind of get it. Not every business has an HR department or can spare someone to draft and redraft a job listing until it’s perfect. But when I see “good verbal and written communication” under “Desired Skills”, I have to laugh.
I won’t go too in-depth with what makes a good job listing, but here are a few pointers:
- Use an appealing job title. Even if the actual job is nothing to get too excited about, strong keywords will attract the kind of candidates you’re looking for.
- Mention your location. You don’t want to invite someone to interview, only to have them turn it down because they were hit with a 200-mile travel distance.
- List the salary (or ballpark figures if you’re really not sure). A job’s salary is a good indicator of the level of expertise and responsibility the role requires. And, let’s face it, everyone is financially motivated. Advertising a job with the attitude “if they really want it, they won’t care what they’re being paid” is just lying to yourself.
- Write about your company. Unless your business carries the same international familiarity as McDonald’s, potential applicants don’t like guessing what industry you’re in. Try and relate the description to the role; if the applicant wants to find out more, they’ll do some research.
- Use the correct contact details. This should speak for itself.
2. Add a “Trick” Question To Your Job Description
In my last job listing, I signed off with, “Along with your CV and cover letter, please attach a short document naming three celebrities you’d like to have over for dinner, and why“.
There’s no need to perform an in-depth analysis of each candidate’s response.
The point to this exercise is to see if it gets done.
I’ve found as many as 50% of applicants will miss this question because they didn’t read the job description properly.
That’s 50% of applications you can discard immediately.
3. Subject Lines and PDF Formats
When advertising a job, I give potential applicants two clear instructions.
1. To email their application with a specific subject line. That could be something as simple as “FlexxDigital PPC Rockstar Job”.
2. That their CV and cover letter should be in a PDF format.
These aren’t unreasonable requests, but you’d be amazed by how many applicants miss the mark.
You need to reduce possible candidates to those who can follow basic instructions straight off the bat.
4. Treat Applicants To A Quick Telephone Interview
Once I’ve gone through the applications, I’m left with about 15 people I’m interested in.
To be honest, I don’t want to meet all those people face-to-face.
It may not be fair to exclude candidates based on their telephone manner, but adapting to uncomfortable situations is just part of life.
At the end of a 15-minute telephone call, I want to see that the candidate has:
- Good communication skills
- Energy
- Intelligence
- Logic
- Work ethic
- A personality that fits well with my team
I also use the call to ask some standard interview questions, before I launch into the meatier ones in a face-to-face interview.
Any applicant worth their salt should be able to answer these questions naturally and thoroughly:
1. Why did you leave your previous role?
2. Name a time you made a mistake. Tell me how you handled it.
3. Tell me about a time you went above and beyond the requirements for a project.
4. What type of company environment most contributes to your success?
Once I’ve gone through the telephone interview process, I have about five or six people I want to meet face-to-face.
The important thing is to keep culling.
5. Face-to-Face Interviews
Technically, a phone interview should be less pressure than a face-to-face meeting (even if the candidate is phone-phobic). The applicant is in a familiar environment, in casual clothes, and probably have some notes.
When first introduced to your interviewees, keep an eye out for the following:
- Punctuality
- What they’re wearing
- Articulation
- Confidence
- Cognitive skills
- Whether they’d be a good fit.
Most people know they have to make a good impression when attending an interview. What fewer people know is that a first impression is made within seven seconds of meeting.
You should have got through the standard questions in your telephone interview. The face-to-face is your chance to really see what kind of person the applicant is.
This is also your chance to ask questions outside of the norm. Anyone used to interviews will have an answer to “what are your main strengths?” etched into their skulls. However, questions like “what is your favourite non-fiction book or podcast?” is different enough to present a curveball.
And the answer is important. People usually read non-fiction to better themselves and enhance their prospects. If someone appears desperate to become a PPC Manager and they haven’t read a single book on PPC, they’re not going to go over-and-above for your business goals either.
6. The Kolbe Test
At this point, you should have two or three candidates you can see in the role.
So far, you’ve spent about an hour with each person (the 15-minute call and a 45-minute interview). It’s still not enough exposure to know who you’re willing to spend years managing.
At this point, I give my top two or three candidates a Kolbe Test.
The Kolbe RightFit assessment is one of the top career tests that measure a candidate on four traits:
1. Fact Finding. Can the candidate acquire information, then explain, simplify and strategise it?
2. Follow Thru. Can the candidate organise, adapt and systemise data?
3. Quick Start. How quickly can the candidate get a job done? This section measures the candidate’s creativity, diversity of thought, and ability to cope with sudden change.
4. Implementer. This test measures how a candidate handles space and objects.
The test is 36 questions and taken online. Each item has four possible answers, and the candidate needs to number them from 1 to 4. 1 = Most Likely, while 4 = Least Likely.
Here are a couple of sample questions:
- If I were told to hurry finishing a project, I would:
- Hurry to finish it
- Take my time to get it right
- Discuss the rush
- Enlist a coworker to help
- If I were trying to solve a problem, I would depend on my:
- Experiments
- Ability to organise
- Skills
- Research
For the Kolbe to work, you need to know exactly what traits you’re looking for in the role.
A top-class videographer is definitely going to give different answers to a professional PPC Manager. You need to take this into account.
For more information on the Kolbe Test, just click here. The basic test costs $50.
Choosing Your Winner
So, by now you have whittled down your prospects to perhaps two maybe three potential hires. They have completed your test task well, they know how to follow instructions, and their Kolbe score is a great fit for the job role.
Personally, I tend to see the best in everyone which makes me unfortunately a pretty bad ‘hirer’ of staff, although I have had a lot of success with great staff. What you need at this point is someone (this could be another staff member, or your partner) who is a little more skeptical and will dig deeper and look for potential issues and character defects.
Someone else helping make your decision is smart at this late stage of hiring.
Discuss with your ‘helper’ and then make a decision
My final point is this. I once read ‘never hire someone you wouldn’t potentially work for yourself’ – bear this in mind when making your decision, it’s always a good rule of thumb.
Now It's Your Turn!
Building and scaling a 7+ figure agency is hard work, and it can’t be achieved overnight.
However, wherever you are in your Pay Per Lead agency journey, whether it’s wanting to change your vertical completely or to just tweak your sales funnel for more leads, where there’s a will, there’s a way.
More importantly, where there’s knowledge there’s a way.
That knowledge is exactly what you need to make a big change.
You may be considering making the leap to PPL from the retainer model.
It may seem like a big, scary leap in the dark.
But it shouldn’t feel like a leap into the unknown.
That’s why I have a Gamplan for you.
The exact steps you need to follow to get where you want to be.
To grow and start evolving your PPL agency.
Watch my Gameplan here.
– Dan


