The Facebook Conversion API With Unbounce
With the introduction of iOS 14, the Facebook Conversion API with Unbounce has become a must-have!
Before you could have gotten away with just having browser events for your tracking, but iOS 14 has dropped a huge proverbial dump on the accuracy of this tracking method.
Why?
Because Apple is hiding the cookie data of those who opt-out of tracking on iPhones which means the Facebook Pixel will not know if they convert or not.
So our students and I have seen huge discrepancies in the number of conversions we are seeing.
The Facebook Conversion API can really help with this because:
- Events are only sent to FB once they convert (Server-Side Events)
- These are much more accurate than browser events
- Works with browser events to ensure the best accuracy possible
Therefore we have created a definitive guide to setting up the Facebook Conversion API, so you can implement it easily in your agency WITHOUT the need for a developer.
We use landing page software called Unbounce, and surprisingly, they haven’t helped at all on this subject.
A quick scan of their community help sections… Crickets!
So we thought we’d do one to help you guys out looking for a solution!
Let’s get into it…
First things first…
What to do inside Facebook?
You first need to get all the information you will need to create the Zap within Go High Level
- Pixel ID
- API Token
- Name of conversion
To find these –
- Pixel ID – Go to “Business Settings” > “Data sources” > “Pixels” > Select your pixel > Click on the “ID” to copy to clipboard > Add to your notepad.
- API Token – Go to “Events Manager” > “Data Sources” > Select your pixel > Click “Settings” > Scroll down to “Conversions API” > Click “Generate Access Token” > Copy and save to your note pad.

- We are going to trigger this on successful form fills, so we will be using the “Lead” event.
The Facebook Conversion API with Unbounce is relatively simple compared to others *sigh of relief* so I will take you through how to set it up.
Setting up the Conversion API Unbounce
So, obviously, first, you will need an Unbounce account to be able to utilise this. If you don’t have one you can create one by clicking here.
Once you are in the account let’s get at it!!!!
- Log into your Unbounce Account.
- Create Your landing page and attach a form.
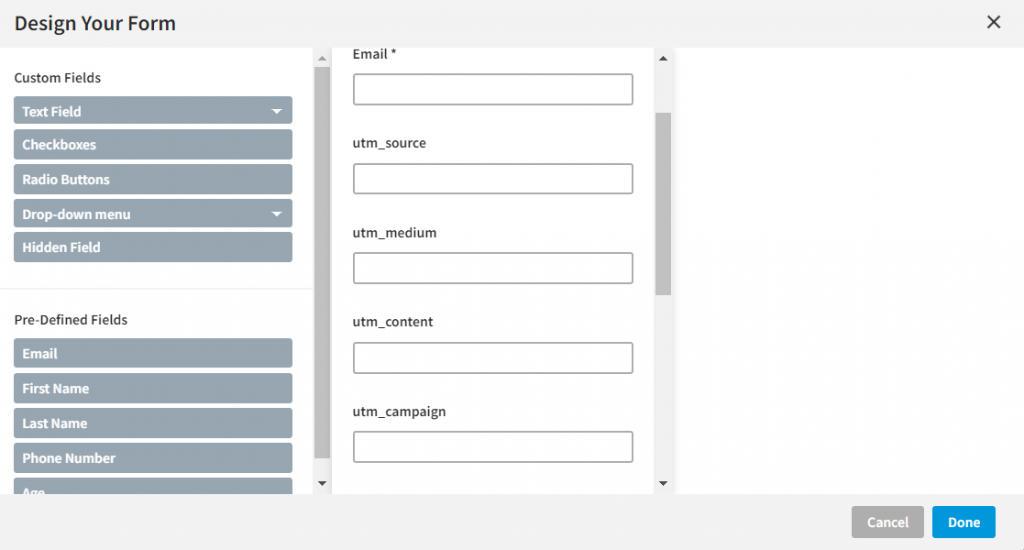
- Then add in all your hidden fields that you need (these are necessarily needed for the conversion API but it’s best practice to collect as much data as possible).
- We usually add in utm_source, utm_medium, utm_content, utm_campaign, placement, and fbclid.
- Once thats done, save and publish.
- Then clear any cookies you have on your computer from Facebook and then login.
- Click on the first ad you see and copy and paste the “fbclid” in the URL.
- Open up your landing page and make sure that you add the following string to your URL so you know your hidden fields are working –
- ?utm_source=Production&utm_medium=Audience1&utm_content=Ad1&utm_campaign=Facebook&placement=Facebook_Desktop_Feed&fbclid=INSERTYOURFBCLIDHERE
- Then press enter, and put through a test lead.
- Now you want to login into your Zapier account
- Then you want to create a new zap.
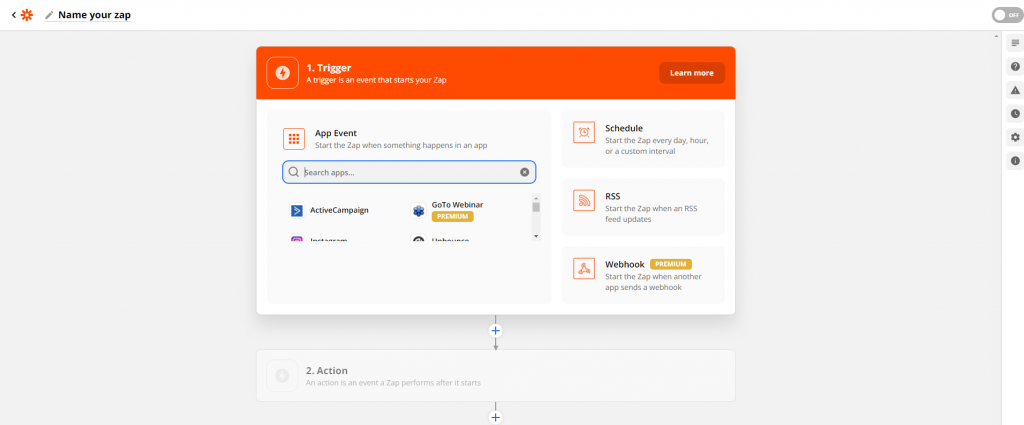
- The trigger should be Unbounce.
- The event should be “New Form Submission”
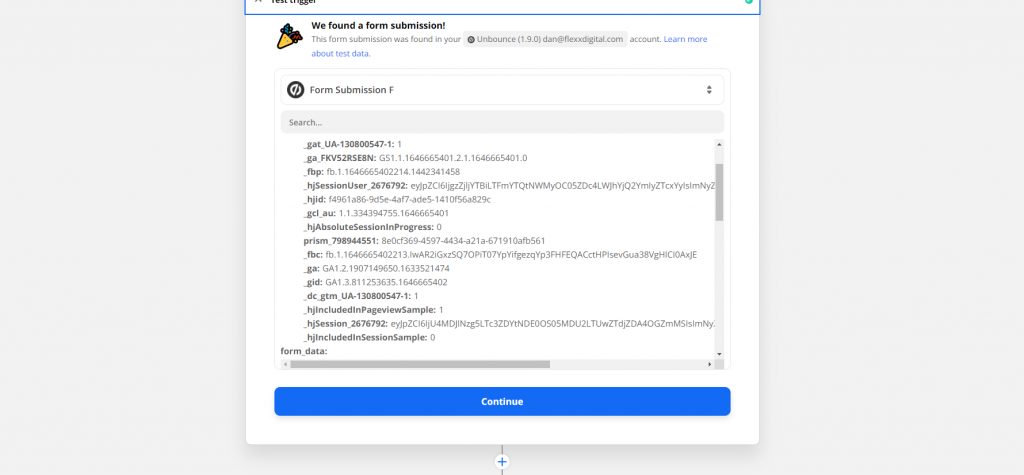
- Connect your account.
- Chose the page that has the form you want to connect to the Facebook Conversion API.
- Then test your trigger and make sure all the data has come through.
- Now you want to set up the next action step. I’d recommend first putting the lead and its information into a CRM or Google sheet, before then choosing the action step “Facebook Conversions”.
- Then select “Send Other Event”.
- Link your Facebook Account & Zapier.
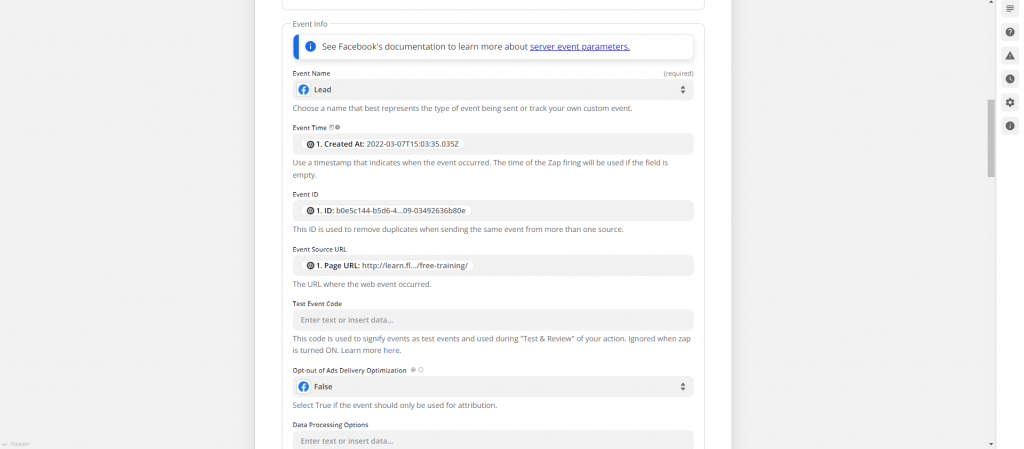
- Then you want to set up your action.
- Fill in as much of the data as you can with the Unbounce data provided.
- Check out the video at the top and watch from 6 minutes 30 seconds. This will talk you through the process.
- Ensure you have got your Test code from Facebook, as discussed in the video and then you can test it.
- Once you’ve put the test through, you should see something like this in the test section of your Pixel.

- Check everything has been pulled through correctly and then you can go and take the test code back out.
- Then turn on your zap and you’re good to go.
- Your Facebook Conversion API is fully functional!
Want access to our other tutorials?
Go check out our Flexxable YouTube channel…
All you need to grow your PPL lead gen agency