How To Add The Facebook Chat Plugin To Your Landing Page 🤓
Why Should You Use The Facebook Chat Plugin?
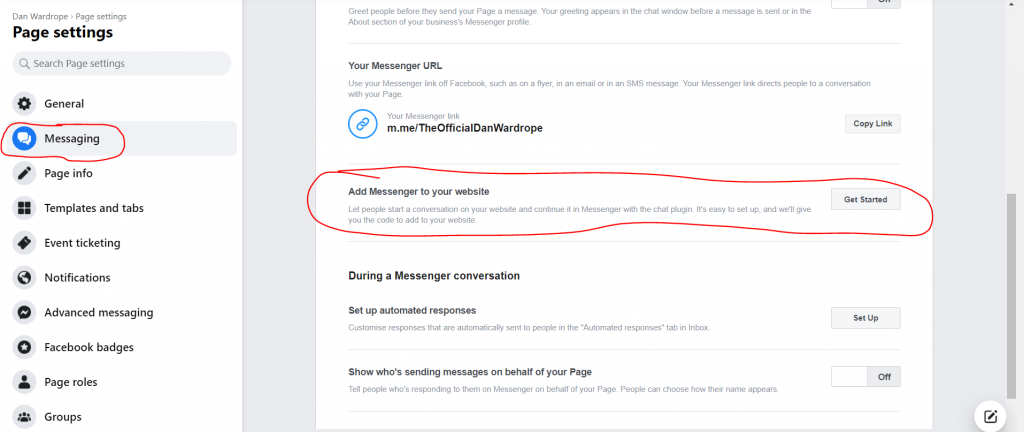
The Facebook Chat Plugin is extremely simple to add to your website.
There has been a growing trend for a while to have a live chat feature on your website/ landing page so people can speak to someone quickly without having to wait for an answer.
However, live chat functions can be expensive and there can be costs for each lead they collect.
This is where the Facebook Chat Plugin can come in handy.
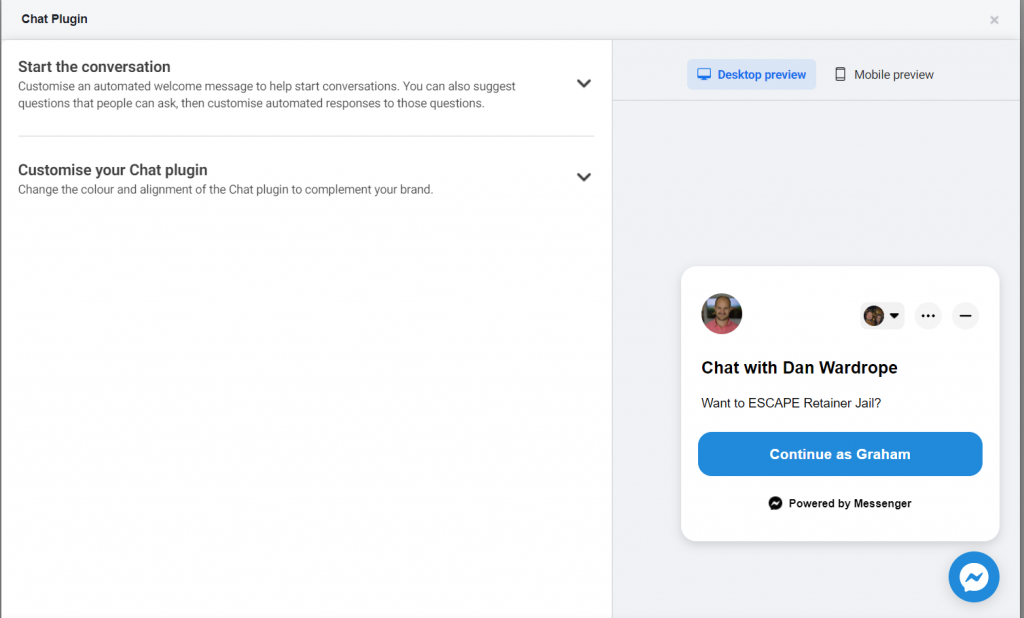
It’s completely free and is linked to your Business’ Facebook Page so you can easily handle chats that do come in.
Also, you can easily attach a Facebook chatbot to the plugin so you gain any information you need before live chatting to them.
Adding the Facebook Chat Plugin is one of our top tips for 2022 to increase landing pages conversion rates.
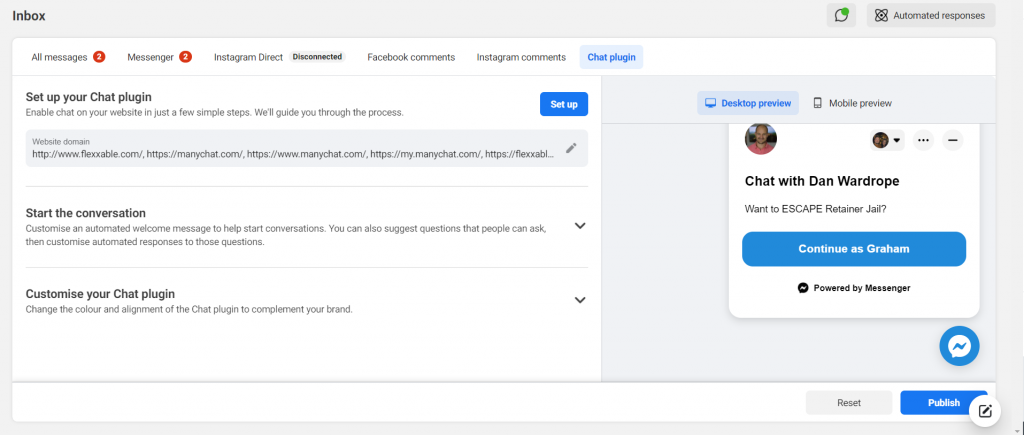
How to add the Facebook Chat Plugin to your site?
So there are a couple of ways to do this, and it depends on where your site is hosted.
In the video above I go through how to add it to Unbounce and WordPress.
WordPress
So adding the Plugin to a WordPress site is extremely easy.
Follow these simple steps to implement…
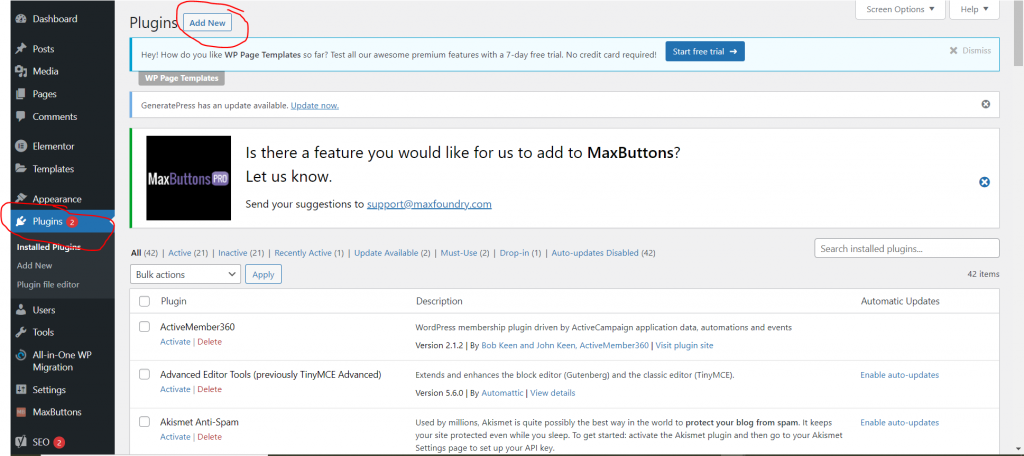
Go into the backend dashboard of your WordPress site.
On the left-hand menu find “Plugins” and click it.
Then in the top left-hand corner, there’s an “Add New” button for you to click
Then once you’ve done that you need too..
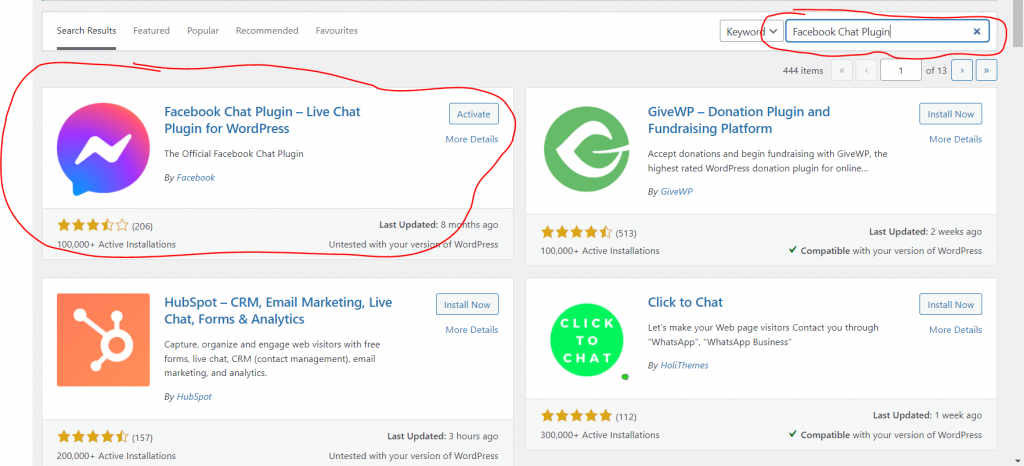
Search in the search bar “Facebook Chat Plugin”.
Click “Install Now” on the Facebook Chat Plugin.
Once that’s finished you need to click “Activate”
Looking for white label partners, funnel peeps or hard core closers for your offer? Join my free Facebook Group “The Pay Per Lead Ninjas”
Learn the AI-Powered Lead Reactivation System for Marketing Agencies, Without Ads, Funnels, Sales Bros, Or SEO… with AI doing all the work
You can do this over and over again, you don’t need tech skills, ads or funnels, and this crushes in the Brick & Mortar, Finance, E-Comm, B2B & Info-Product niches.